Introducing the Transloadit Wizard: a quick setup guide

Tyler McAllister
One of our new creations here at Transloadit is the Transloadit Wizard. This tool allows you to quickly create Encoding Instructions tailor-made to your needs in only five short steps. The Instructions are saved in a Template for security and reusability. My teammates recently created this feature, so today I will give it a spin and take you through a short tutorial to show how effective the Wizard really is. If you have a Transloadit account and want to follow along, you can find the Wizard here.

What I'm going to do today: creating an Assembly using Python
This walkthrough will go through each step in the Wizard and ultimately create an Assembly that will let me perform a virus check on my users' uploads, extract thumbnails from their videos, add a watermark, and encode them for optimal display on Android devices. I will then use the generated Python integration code to spawn an Assembly and see the results.
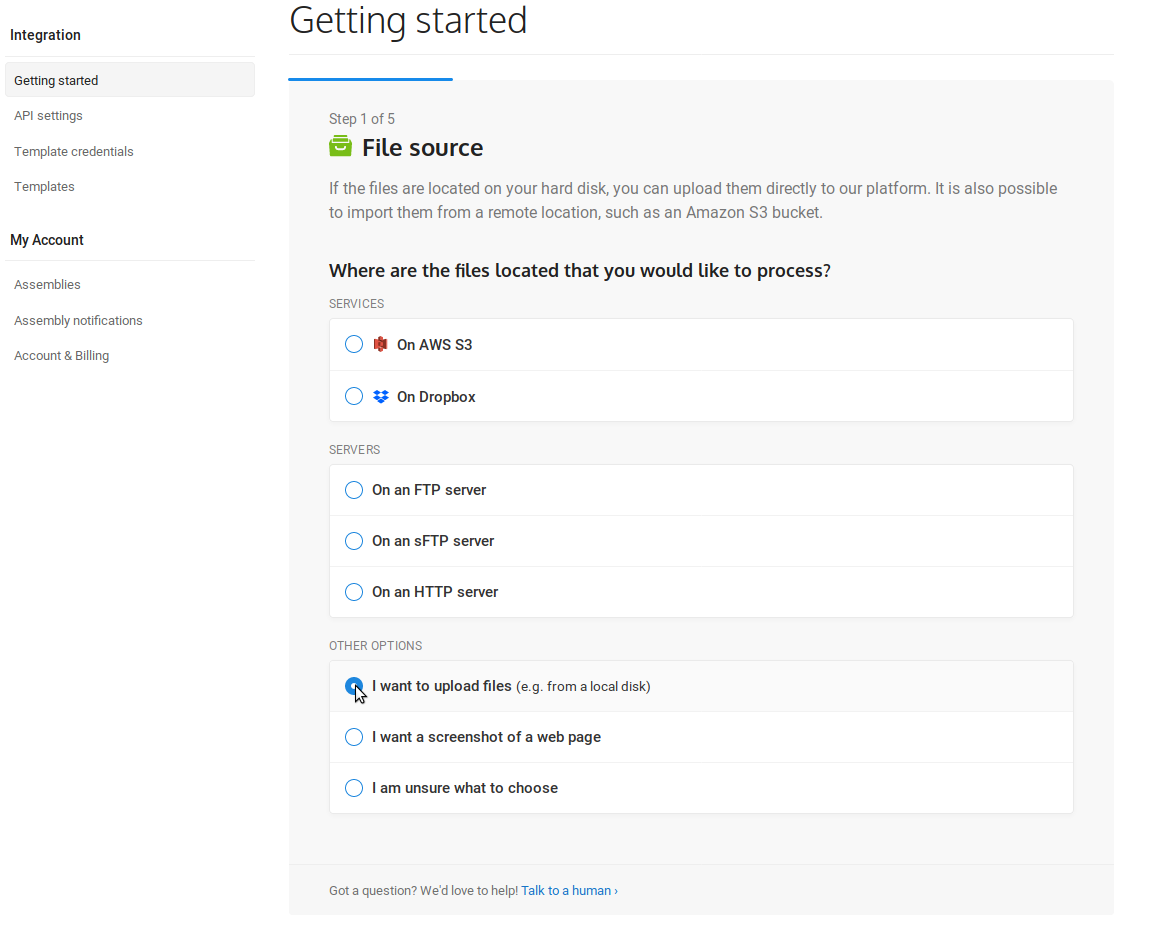
Step 1
Starting from the Getting Started page, I click on the Get Started button and reach the first step in the creation of my Template. First, I need to source the video I'm going to use. I can import my source file from a variety of services and servers, but for now I want to upload a test video saved on my local machine, so I choose I want to upload files.
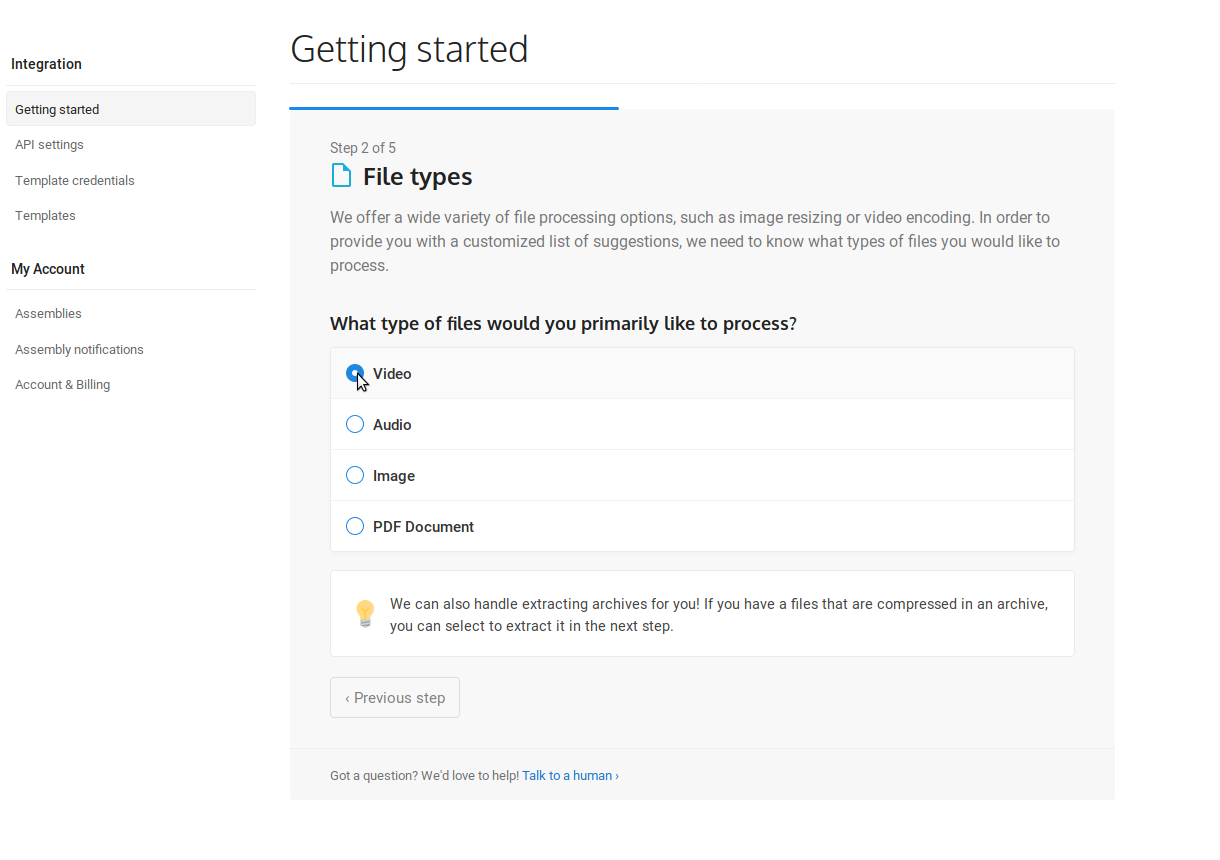
Step 2
For Step 2, I simply select the file type I want to process. I'm going to be working primarily with video files, so I'll pick the Video option - which will take us to the next step.
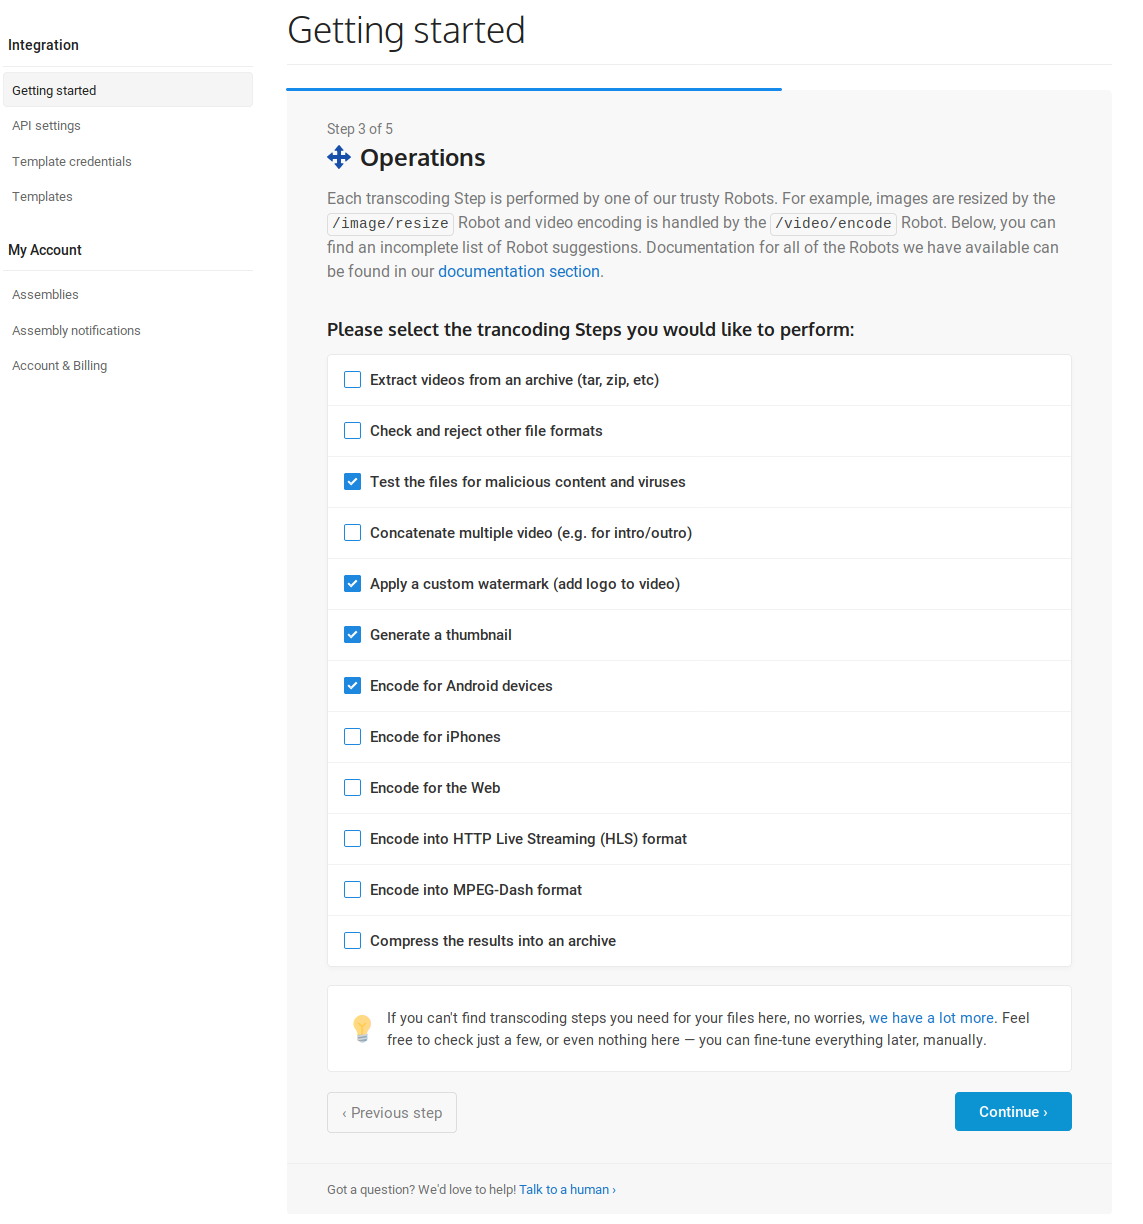
Step 3
Now I can choose the transcoding operations to be performed on my video file(s) by selecting what I need from the list. This list contains only a limited selection of the operations available to us (our documentation contains details on every operation available and examples on how to implement it into your own Template). I want to start with a clean slate, so I first uncheck the default options. I'll then choose Test files for malicious content and viruses, Apply a custom watermark, Generate a thumbnail and Encode for Android devices. That's a lot of power applied in just a few clicks!
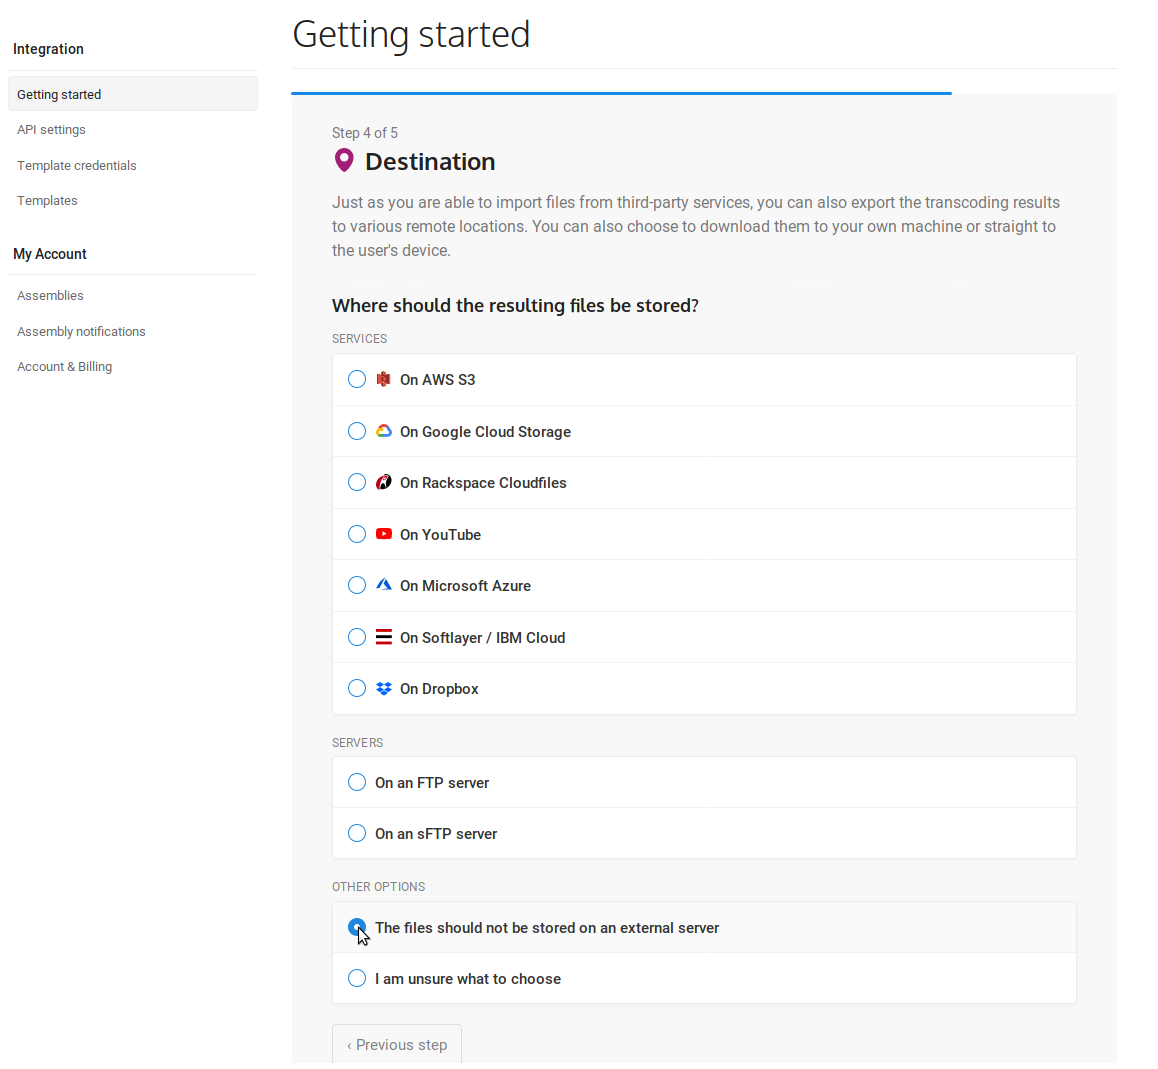
Step 4
I choose the destination of the transcoding results here. There are a quite a few available destinations for the results. To keep things simple, I'll go with The files should not be stored on an external server. Note that storing the results on Transloadit's temporary storage is not ideal, since the files will only be available for 24 hours. Normally, you'd want to export your results to a more permanent storage, such as your own AWS S3 bucket, but for demonstration purposes this should not be necessary.
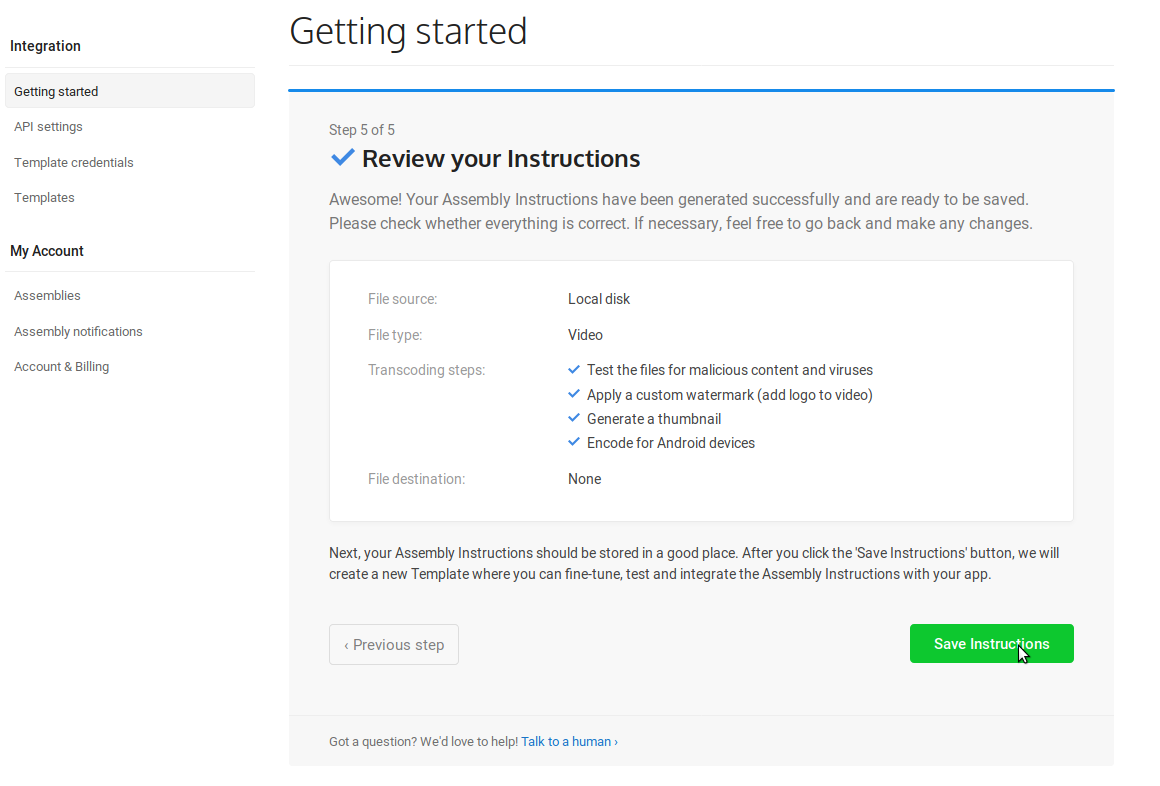
Step 5
All I need to do now is double check that Assemblies spawned from these Instructions are doing everything I want them to. I save my Instructions to a Template and move onto the integration code it generated.
The Template
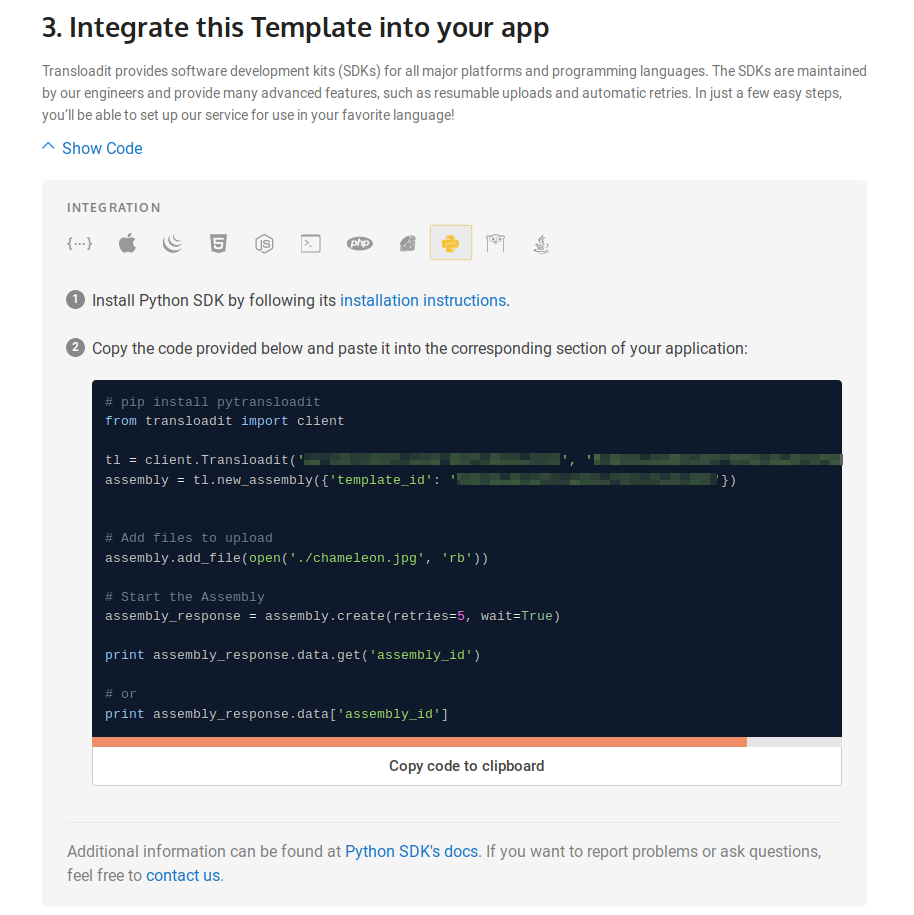
The Wizard will save our Encoding Instructions to a new Template that we can use and test out. Every time we throw files at it, a new Assembly will be created, which we can then poll for status updates. I can either test the Template directly on this Transloadit webpage by uploading my own files or I can generate some integration code to test it out on my machine. I can easily get the code I need and run an example to test it out, so that's what I'll do. As stated at the beginning of this walkthrough, I'll be using Python, but there are numerous other SDKs available to get started quickly. I scroll down to section 3 - Integrate this Template into your app, click Show Code to reveal the selectable Integrations, and select the Python icon.
Running the code
For Python, I need to install pytransloadit via the pip installer, using the command:
pip install pytransloadit
After that, I make a small change to my code to have it fetch the source MP4 video from my disk.
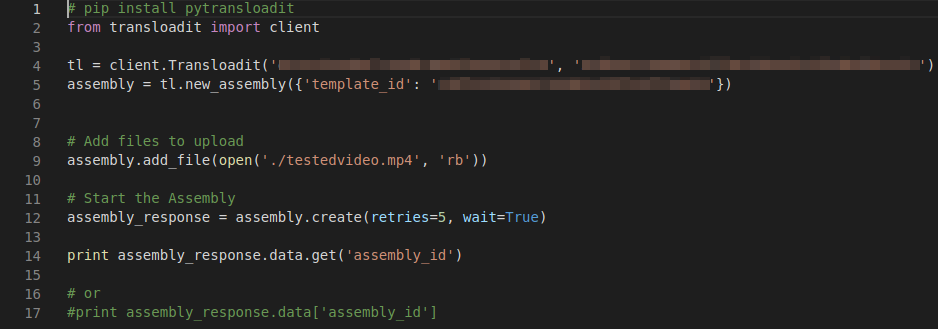
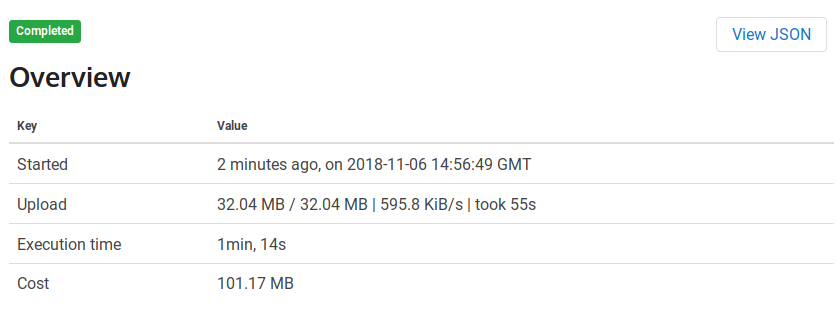
All I need to do is run my code and wait for it to print out an Assembly ID from the response. Checking the Assemblies page on my Transloadit account gives me a real-time record of every Assembly I've run. I can cross-check the Assembly ID printed out by the code to find the Assembly I just ran. By clicking on the ID, I can see that it ran successfully and the results are ready to be saved or opened. Upon checking, it seems like every transcoding operation ran perfectly!
Here's a before and after look at the result.
Try it yourself
For those looking to create Templates quickly, the Transloadit Wizard is an invaluable tool. We have a free plan for open source and testing so do feel free to sign up and check it out. I hope you enjoyed this high-level overview!