
Introducing the /azure/store Robot for Microsoft Azure

Recently, a post by Julian covered the new /digitalocean/store Robot, showcasing a new file exporting provider compatible with Transloadit. As somewhat of a follow-up to that blog (and partly because I felt that Azure could do with some love and attention) we'll dive into the subject of Microsoft Azure containers and how to get them set up!
The /azure/store Robot
Using our /azure/store Robot you can use any Azure container of your choice to store all encoding results from an executed Assembly.

An Azure Blob container groups blobs within a storage account. It organizes stored files rather than running applications, and our Robot can export your processed files directly to it.
Setting up Microsoft Azure
Start by navigating to the Azure website and sign in with your Microsoft details, then proceed to the Azure portal home page and go to Storage accounts. From there, click “Create storage account” and get started setting up your first Azure container.
Under Project details, create and select a resource group, then create a name for your storage
account. In this showcase, I have gone with azurestoredemo. Please note down your chosen name if
you’re following along with this guide, as it will be used later on in the Transloadit side of
things.
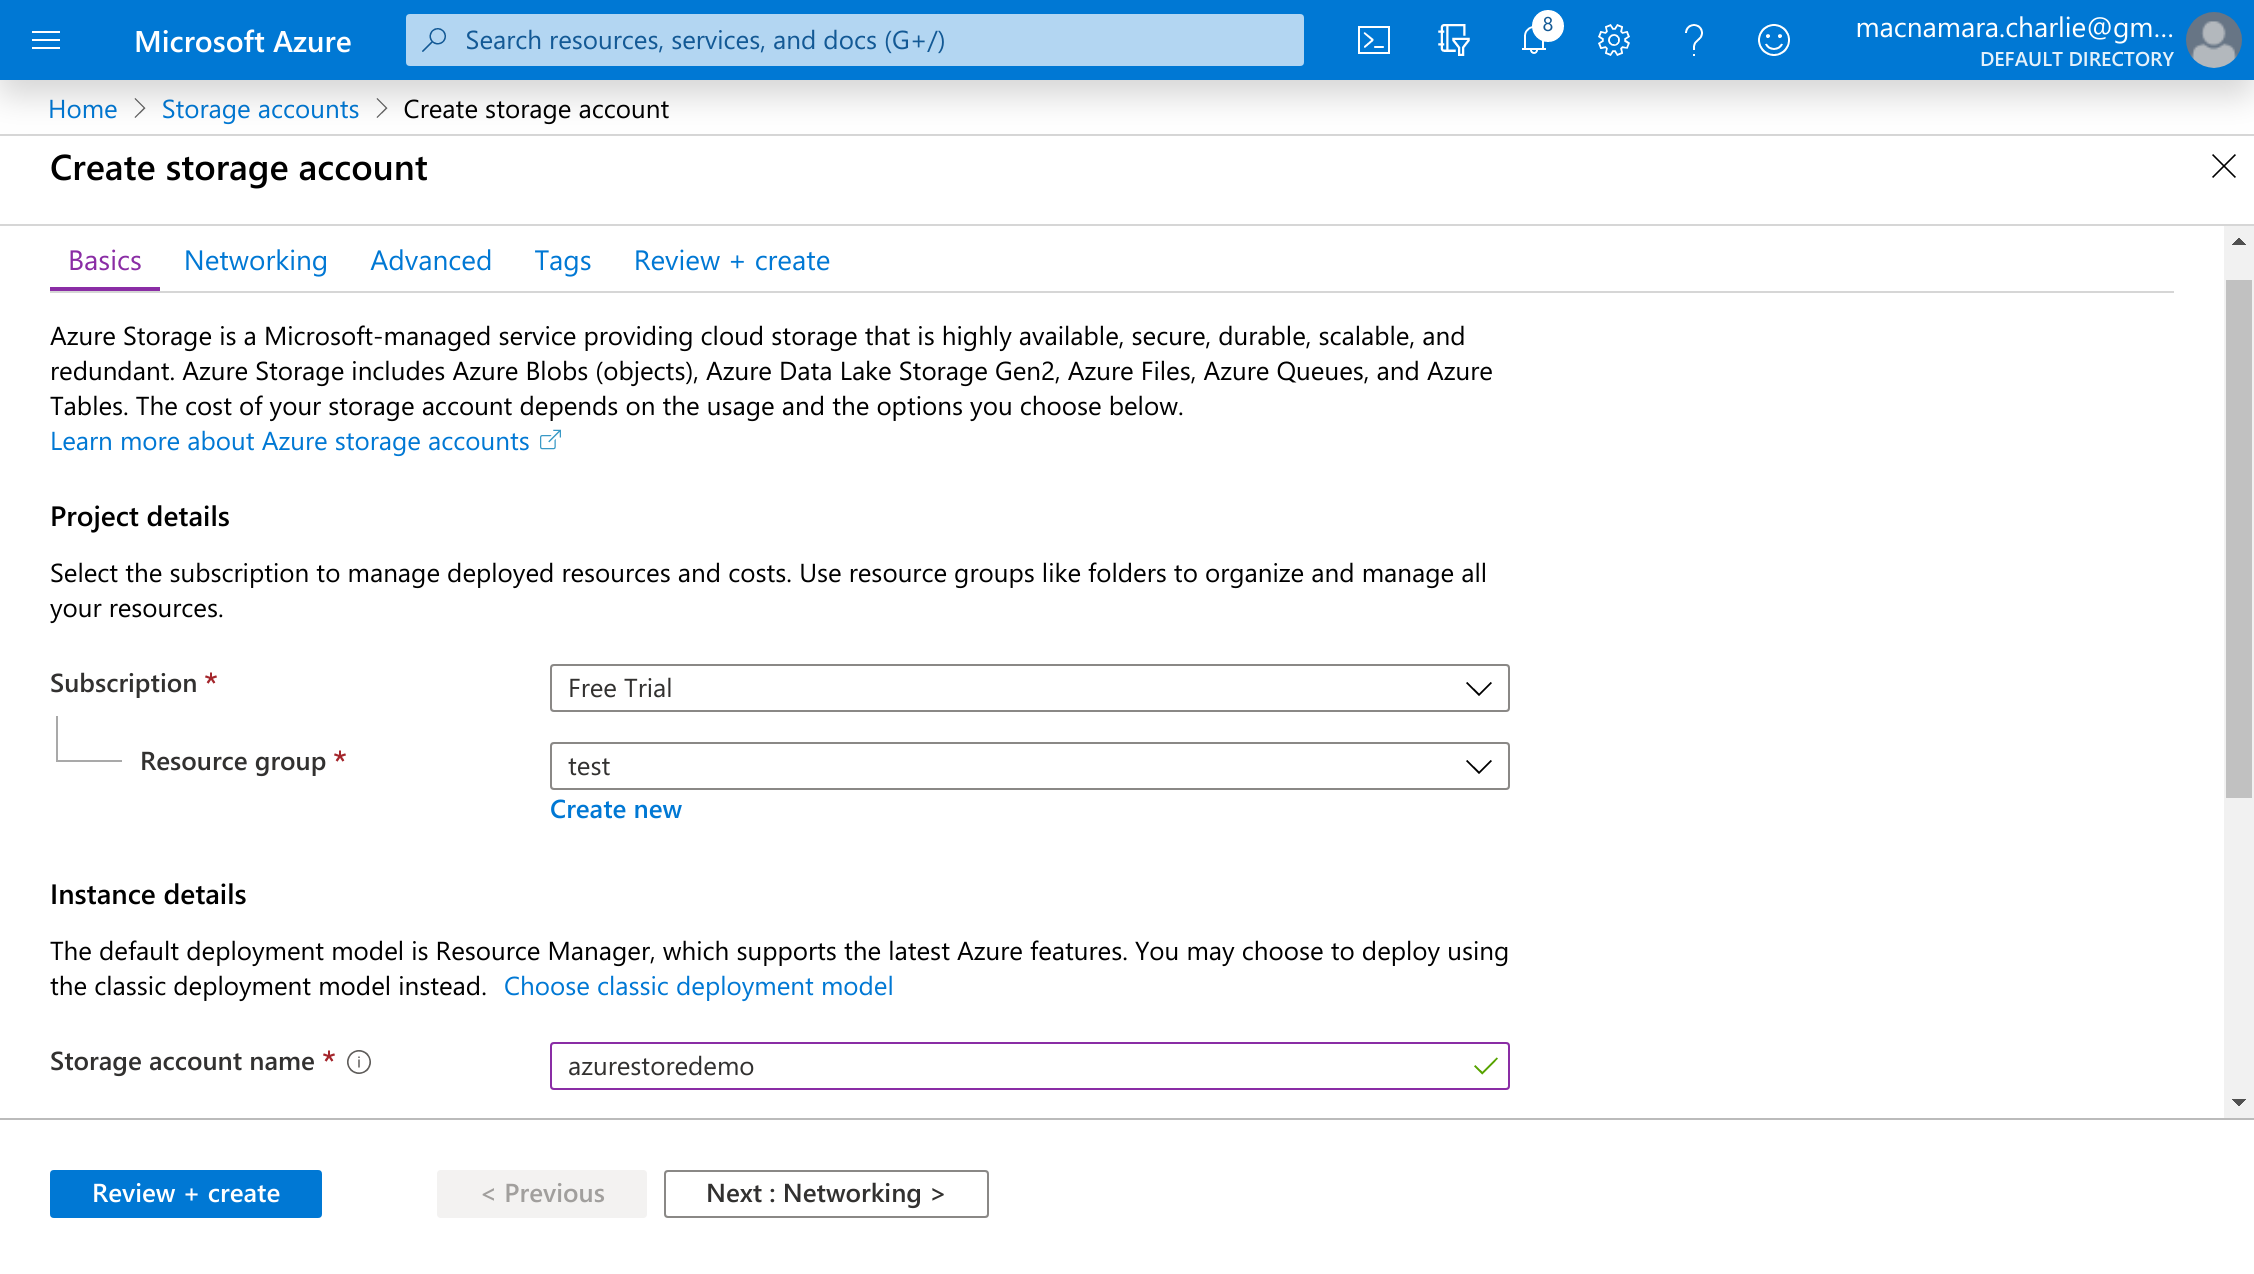
Next, select “Review + create” and wait for the storage account to process. Once initialized, under next steps select “Go to resource”.
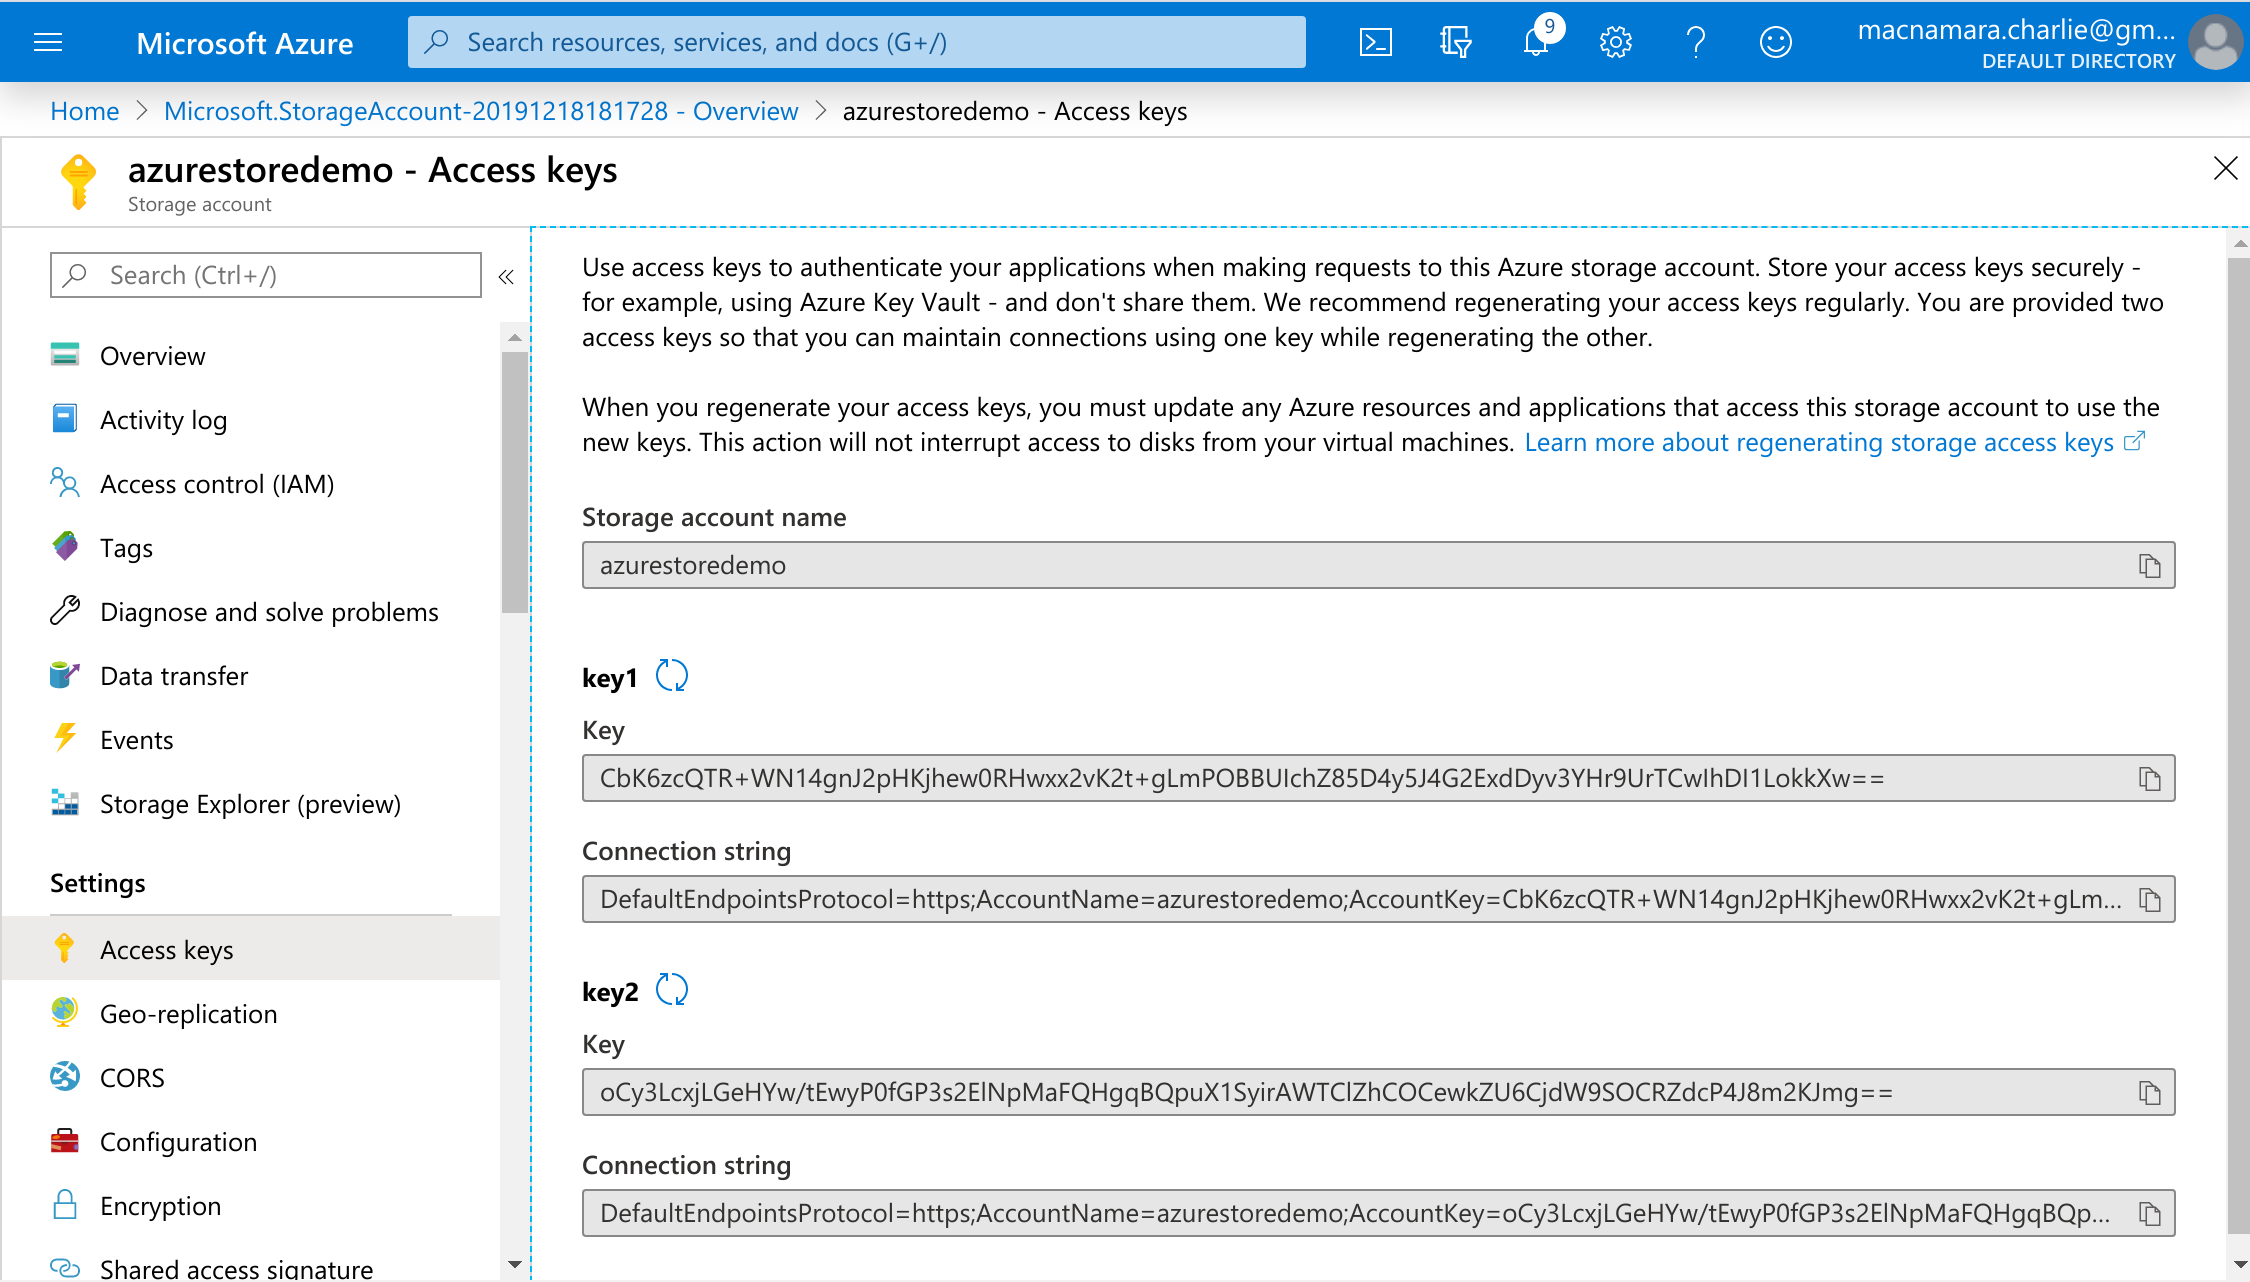
Now we need to set up the way Azure can communicate with our Robot. For this, we need an access key, which can be located on the Access Keys tab on the left. We only need to take note of the first key in order to integrate with our Robots. Even still, make sure to never share your keys with anyone you don't want to give access to your account. If ever needed, reset your key as I have done after creating this post.
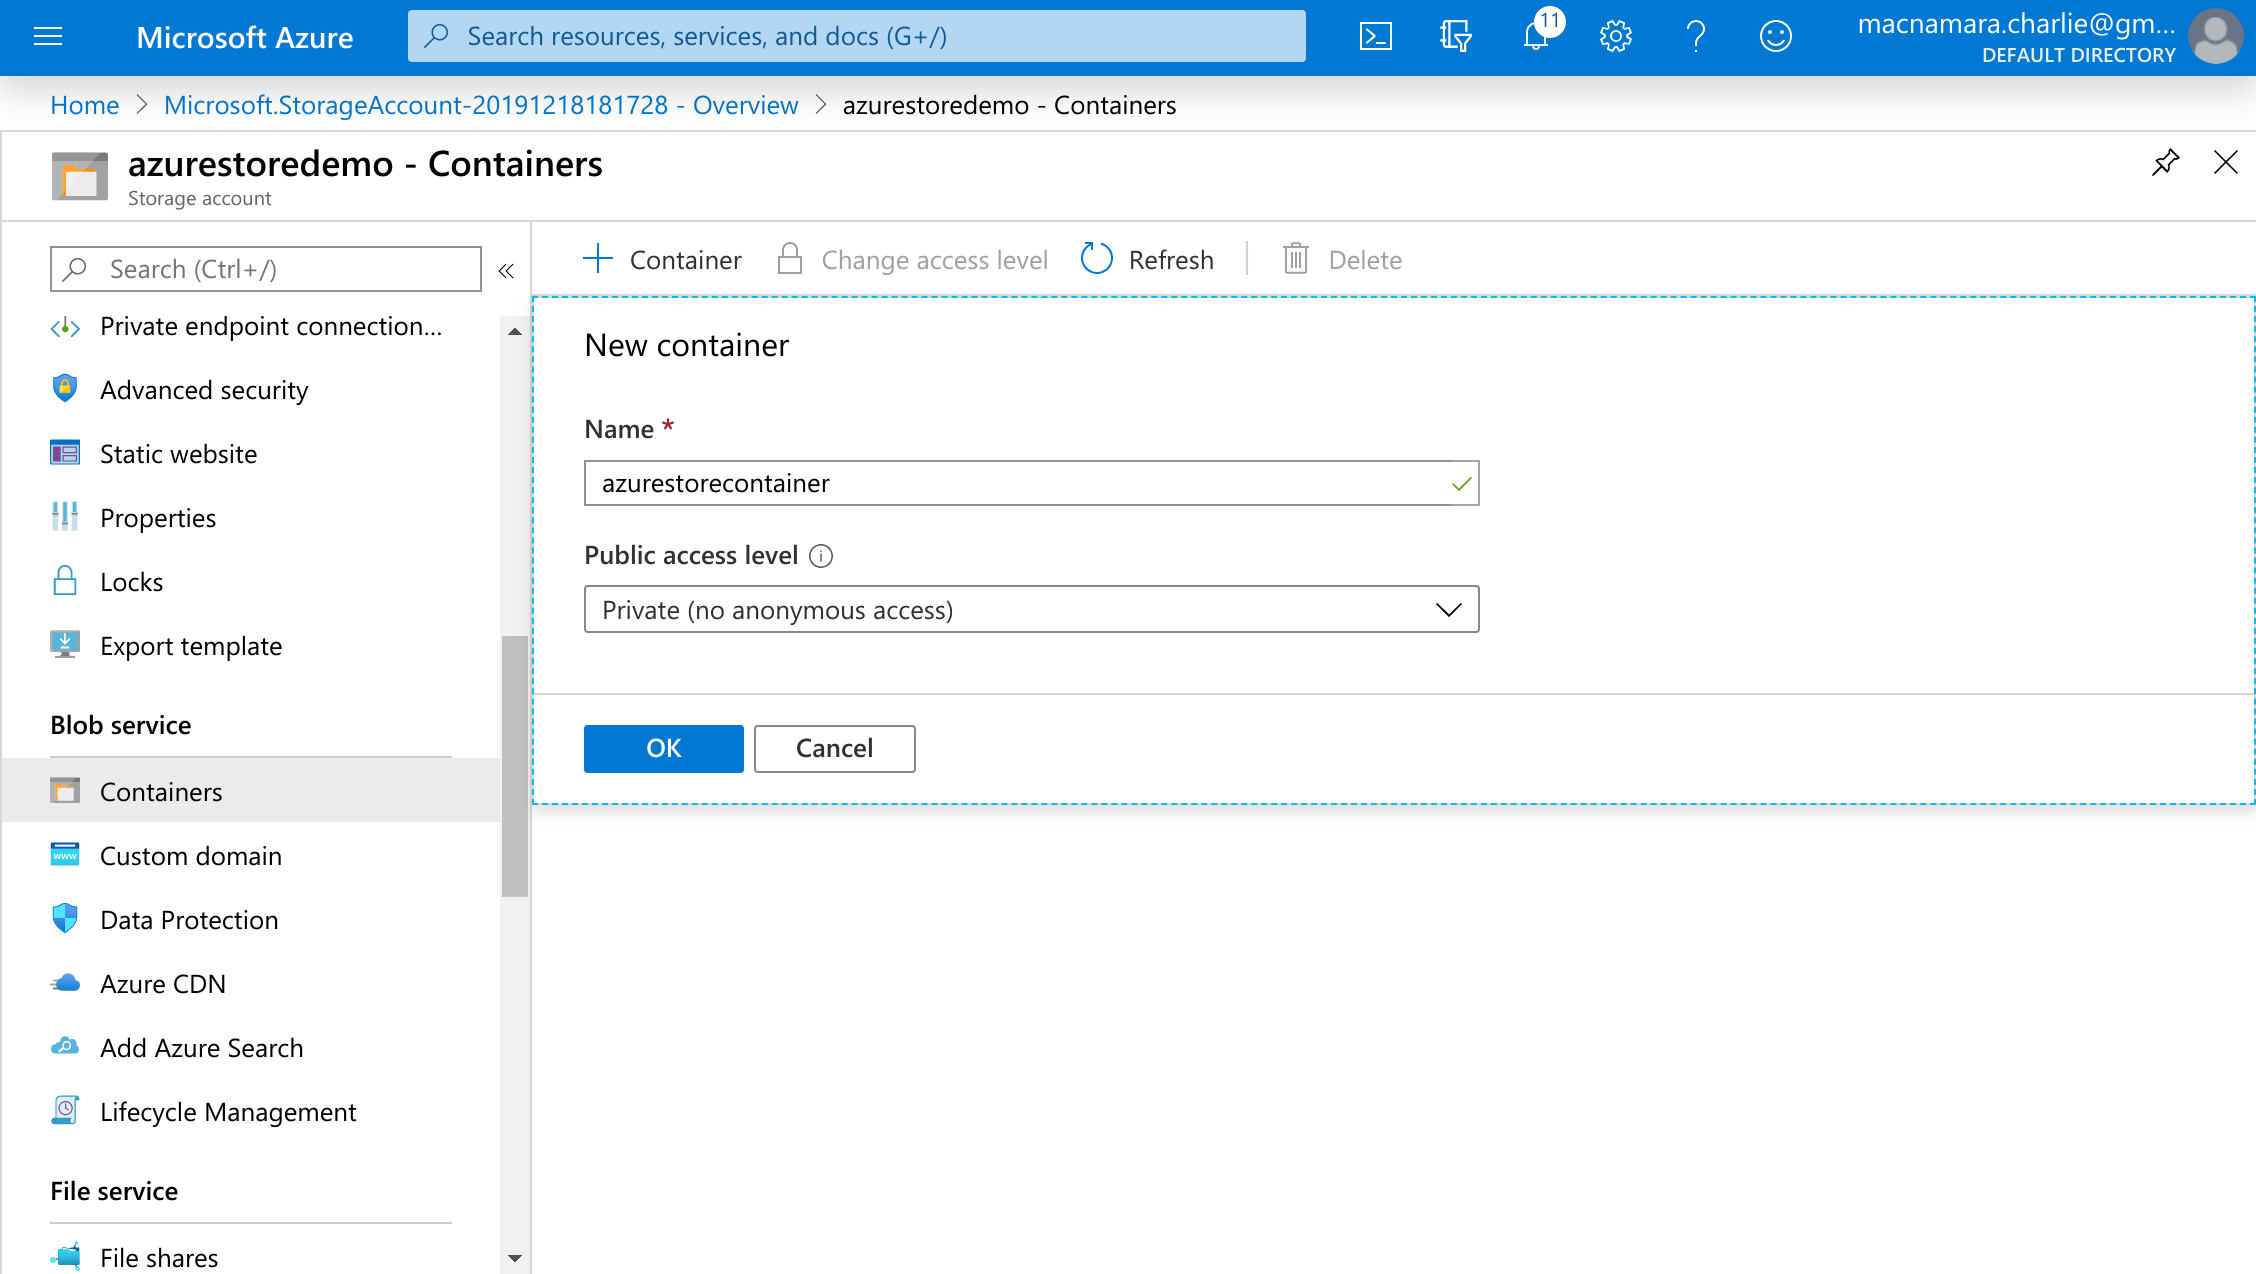
With these steps done, we have almost finished on the Azure website. On the left bar, scroll to the
Blob services section and select “Containers”. Click “+ Container” and choose a container name,
I’ve gone with azurestorecontainer. Again, please note down this name for later use.
Creating Template Credentials
With all the relevant information obtained, we can head over to the Transloadit website and sign in. If you don't already have an account, go ahead and sign up. It's free to do so and gives you access to the full range of useful services we offer. You can even sign up with your GitHub account!
Once signed in, head to Template Credentials. Under the option to select a third party service, select “Microsoft Azure” and paste in the information from your Azure account.
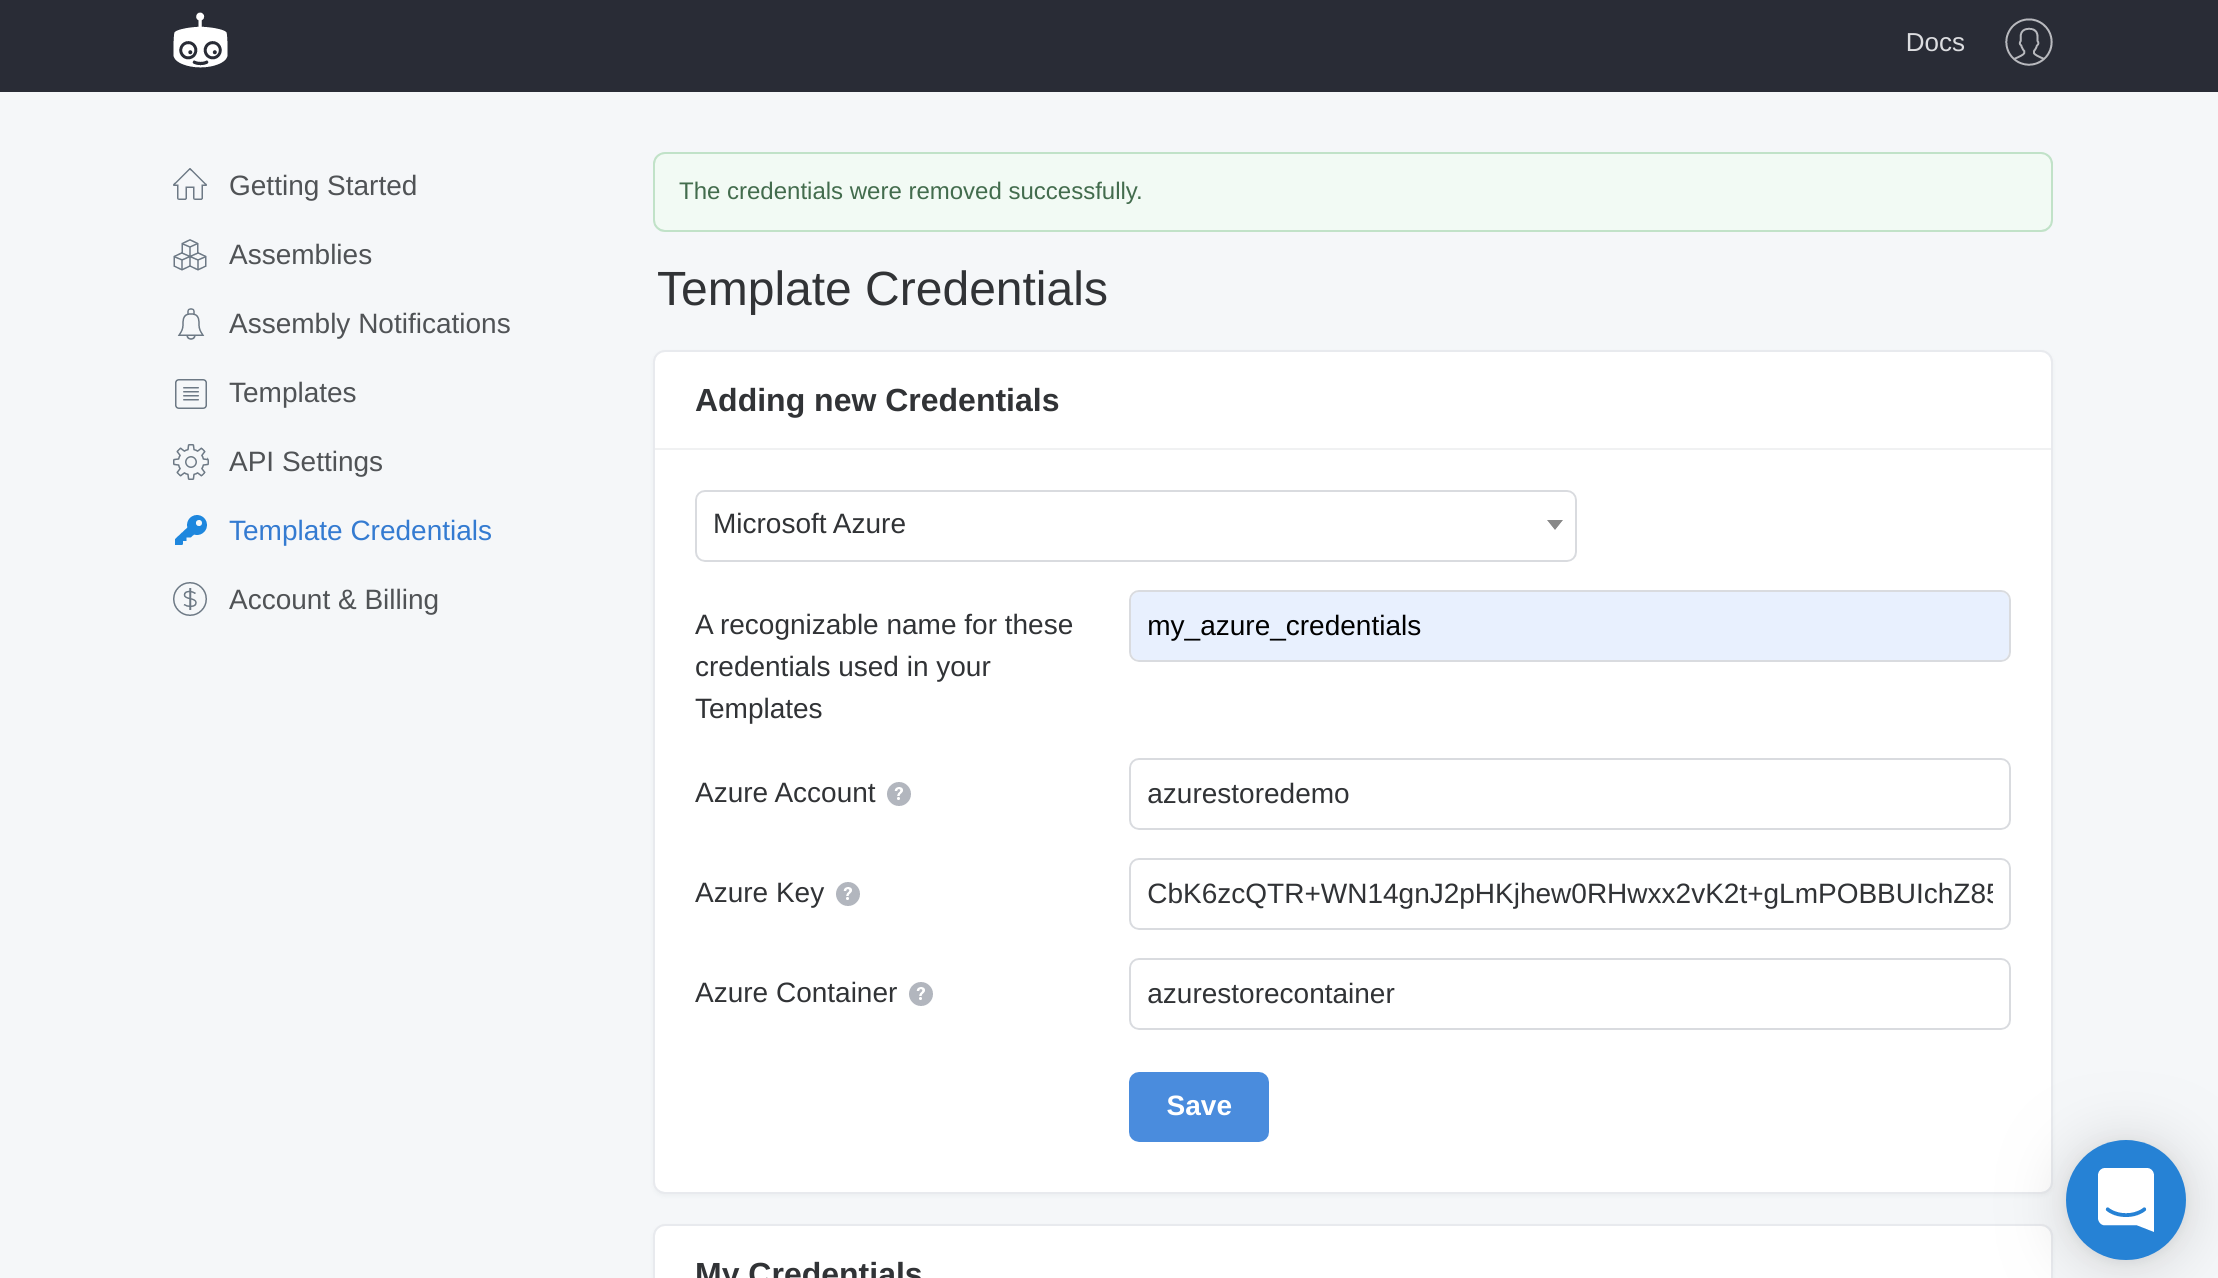
Hit save and take note of the Template Credentials name you have chosen, as we will be
using it in the next step of this guide. In this case, I have called it my_azure_credentials.
Testing the Assembly
Since we have our Template Credentials all set up, we can get round to making use of our newly created container! To do so, I have created the following Assembly Instructions:
assembly.add_step('azure_upload', '/azure/store', {'credentials': 'my_azure_credentials'})
With our created Assembly Instructions, simply fit them into the python Template created below, so it can communicate with Transloadit.
from transloadit import client

tl = client.Transloadit('YOUR_TRANSLOADIT_KEY','YOUR_TRANSLOADIT_SECRET')
assembly = tl.new_assembly()

# Add Instructions, e.g. resize image, or encode video
assembly = tl.new_assembly()
assembly.add_file(open('test-image.jpg', 'rb'))
assembly.add_step('azure_upload', '/azure/store', {'credentials': 'my_azure_credentials'})

assembly_response = assembly.create(wait=True)

print(assembly_response.data['assembly_id'])
The results
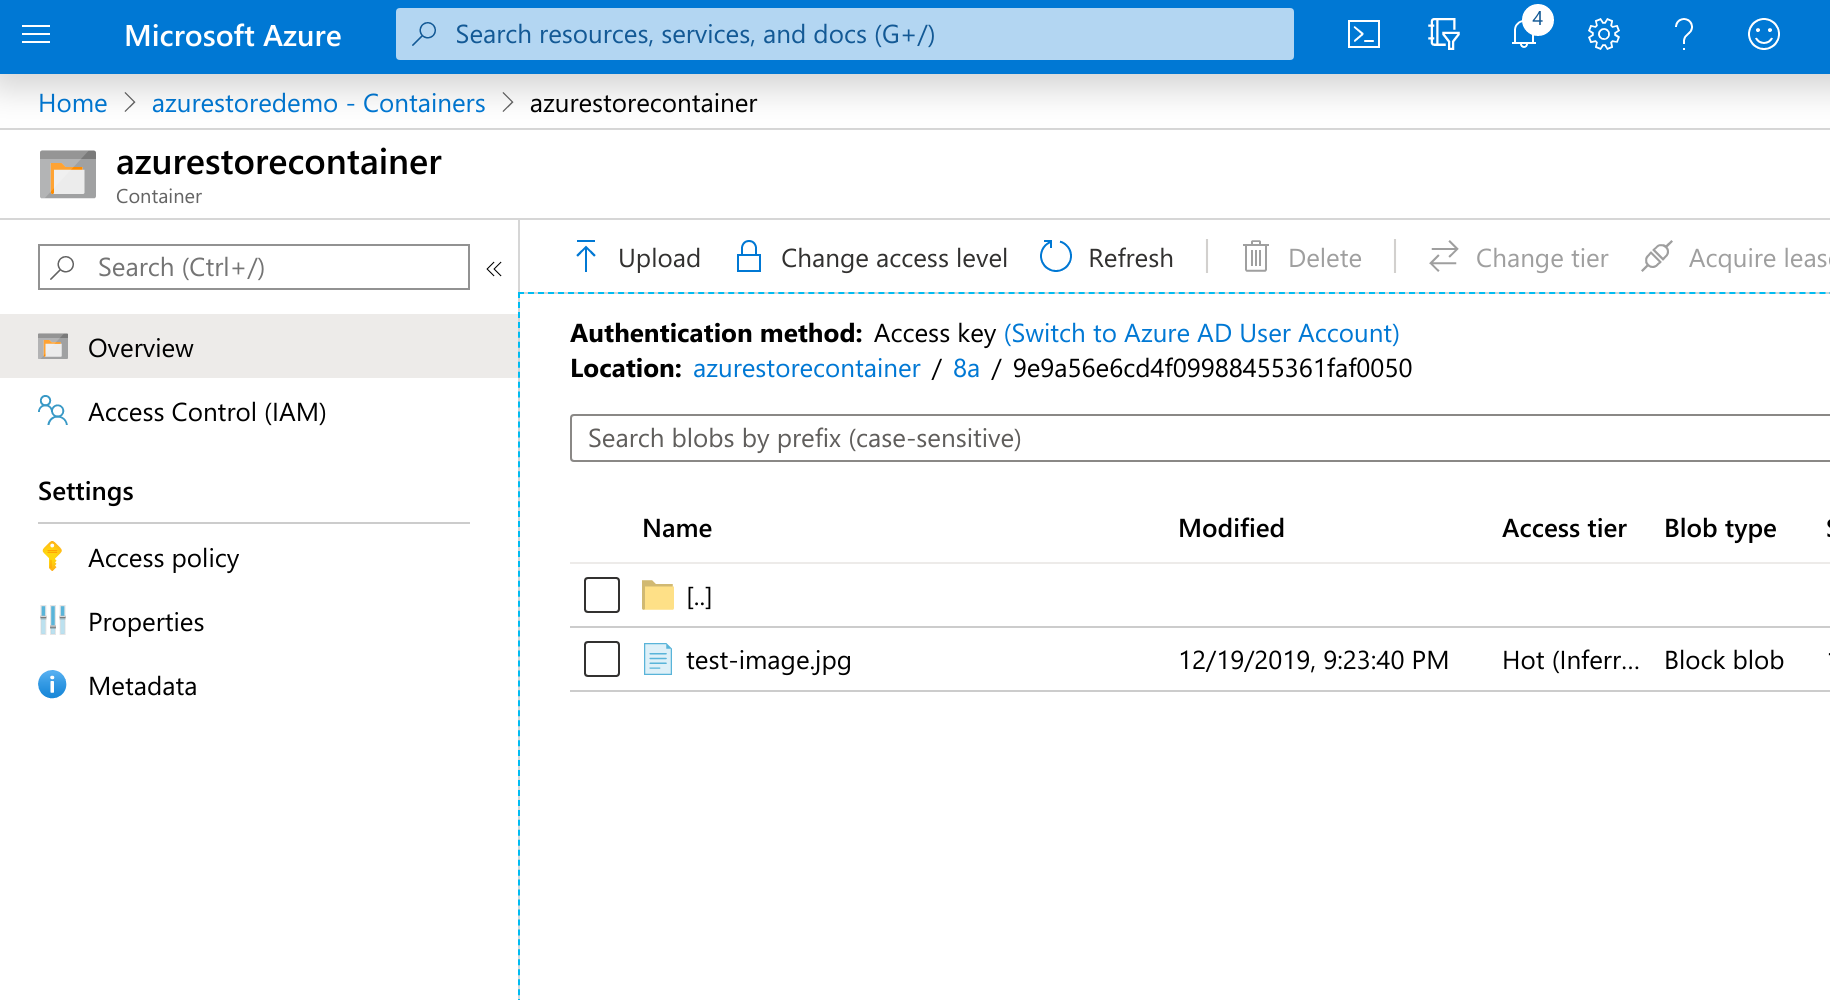
Once we run this Assembly, we can see it works perfectly! Returning back to our recently created container, we can see everything has worked just as intended.
That brings us to the end of this guide, we hope you enjoyed it! Stay tuned for more upcoming posts and features brought to you from us here at Transloadit!