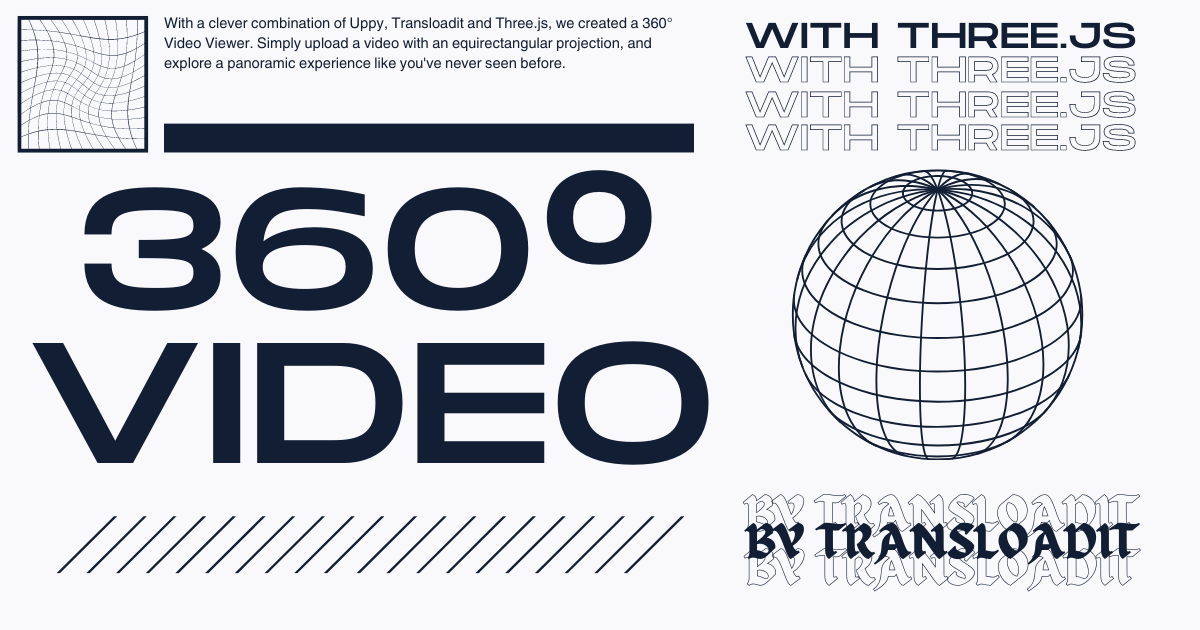
How to build a 360° video player with Three.js & Transloadit
Capturing your memories in 360° video lets you re-experience them in a whole new dimension. VR is still a niche technology, so instead we will create a video player that lets users upload their own 360° videos and watch them from their laptop, powered by Three.js, Uppy and, of course, Transloadit!
Projecting the video
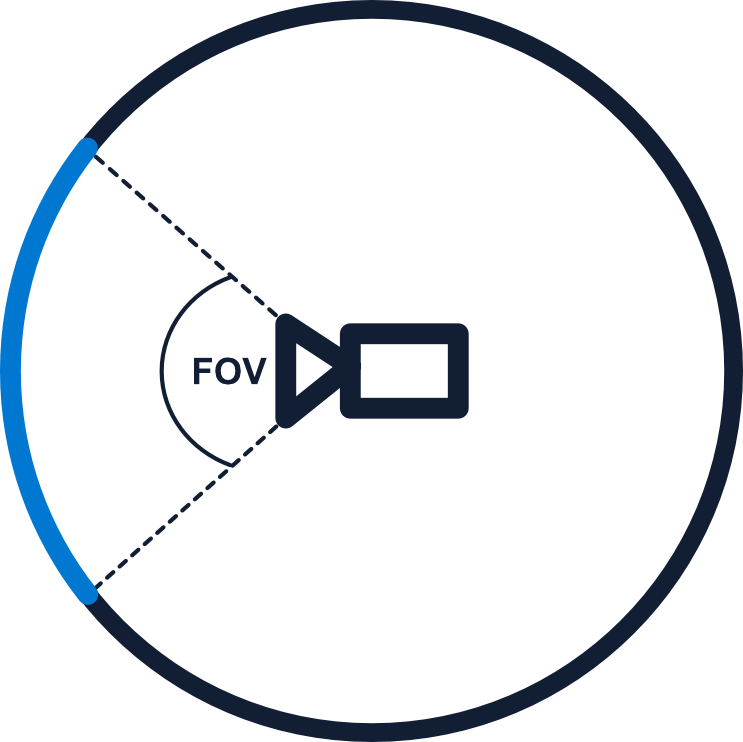
Naturally, the core of any video player is displaying a video. This is easy enough with a regular 2D
video, but the <video> element is not going to cut it for our purposes. This is where Three.js
comes in, letting us project an
equirectangular video onto the internal
surface of a sphere. Then, by positioning a camera within the sphere, we can look around as if we
were really part of the scene. You can see this illustrated in the diagram below.
To create this in Three.js, we first need to create Scene, PerspectiveCamera, WebGLRenderer
and OrbitControls objects.
const scene = new THREE.Scene()
const camera = new THREE.PerspectiveCamera(75, window.innerWidth / window.innerHeight, 1, 100)
const renderer = new THREE.WebGLRenderer()
const controls = new THREE.OrbitControls(camera, renderer.domElement)
const radius = 30
Now, we can initialize the objects in our scene, starting by creating a video with various properties tweaked.
controls.enablePan = false
controls.enableZoom = false

// Points the camera at the horizon by default
// Also moves the camera away for the OrbitControls target slightly so it works
let spherical = new THREE.Spherical(1, Math.PI / 2, 0)
spherical.makeSafe()
camera.position.setFromSpherical(spherical)

let src = 'https://s.bepro11.com/vr-video-sample.mp4'
const video = document.createElement('video')
video.src = src
video.loop = true
video.muted = true
video.playsInline = true
video.crossOrigin = 'anonymous'
video.play()

renderer.setSize(window.innerWidth, window.innerHeight)
document.body.appendChild(renderer.domElement)

const texture = new THREE.VideoTexture(video)
const geometry = new THREE.SphereGeometry(radius, 48, 32)
const material = new THREE.MeshBasicMaterial({ map: texture })
material.side = THREE.BackSide

const sphere = new THREE.Mesh(geometry, material)
scene.add(sphere)
You'll notice that nothing is visible yet, as we still need to trigger a render of our scene. Create
an animate function, which will contain both the requestAnimationFrame and render functions.
function animate() {
  requestAnimationFrame(animate)

  renderer.render(scene, camera)
}

animate()
Et voilà! We can now see the video being played, and we can look around thanks to the
OrbitControls addon. Although, You may notice that if we resize the window, we encounter some odd
scaling issues. Let's quickly fix that now.
window.addEventListener('resize', onWindowResize)

function onWindowResize() {
  camera.aspect = window.innerWidth / window.innerHeight
  camera.updateProjectionMatrix()

  renderer.setSize(window.innerWidth, window.innerHeight)
}
The above function is pretty simple. We listen for the window being resized. When it is, we'll update both the aspect ratio of our camera, as well as the size of the renderer, to match the new dimensions of the screen.
Adding zoom controls
Adding zoom is pretty simple. While, OrbitControls does offer this, it's not a perfect match for
our video player, so lets implement it ourselves. Create an event listener and handler for the
scroll wheel, then update the camera's FoV according to the distance scrolled, as well as refreshing
the camera's projection matrix.
renderer.domElement.addEventListener('wheel', handleZoom)

function handleZoom(e) {
  camera.fov = clamp(camera.fov + e.deltaY / 10, 10, 100)
  camera.updateProjectionMatrix()
}
It's really as easy as that!
Uploading videos with Uppy
Let's expand around the player now, by allowing users to upload their own videos. First, we'll sketch out a basic UI.
<div class="floating-box">
  <h2 class="title">Upload a 360° file to view</h2>
  <!--- from https://loading.io/css/ -->
  <div class="lds-ellipsis" id="loading-dots">
    <div></div>
    <div></div>
    <div></div>
    <div></div>
  </div>
  <div id="container">
    <input type="file" id="file-input" accept="video/*" required />
    <button id="submit-button">Submit</button>
  </div>
</div>
.floating-box {
  position: absolute;
  z-index: 10;
  margin: 30px;
  width: 18%;
  background: #fff;
  display: flex;
  flex-direction: column;
  padding: 20px;
  align-items: center;
  padding-top: 0px;
  justify-items: center;
  font-family: Helvetica;
}

#container {
  display: flex;
  flex-direction: column;
  gap: 8px;
}

.lds-ellipsis {
  display: inline-block;
  position: relative;
  width: 80px;
  height: 80px;
}
.lds-ellipsis div {
  position: absolute;
  top: 33px;
  width: 13px;
  height: 13px;
  border-radius: 50%;
  background: #000;
  animation-timing-function: cubic-bezier(0, 1, 1, 0);
}
.lds-ellipsis div:nth-child(1) {
  left: 8px;
  animation: lds-ellipsis1 0.6s infinite;
}
.lds-ellipsis div:nth-child(2) {
  left: 8px;
  animation: lds-ellipsis2 0.6s infinite;
}
.lds-ellipsis div:nth-child(3) {
  left: 32px;
  animation: lds-ellipsis2 0.6s infinite;
}
.lds-ellipsis div:nth-child(4) {
  left: 56px;
  animation: lds-ellipsis3 0.6s infinite;
}
@keyframes lds-ellipsis1 {
  0% {
    transform: scale(0);
  }
  100% {
    transform: scale(1);
  }
}
@keyframes lds-ellipsis3 {
  0% {
    transform: scale(1);
  }
  100% {
    transform: scale(0);
  }
}
@keyframes lds-ellipsis2 {
  0% {
    transform: translate(0, 0);
  }
  100% {
    transform: translate(24px, 0);
  }
}
We can now throw Uppy into the mix, by first importing it and then initializing the Transloadit plugin.
import { Uppy, Transloadit } from 'https://releases.transloadit.com/uppy/v3.13.0/uppy.min.mjs'

const uppy = new Uppy({
  restrictions: {
    allowedFileTypes: ['video/*'],
    maxNumberOfFiles: 1,
  },
  autoProceed: true,
})
uppy.use(Transloadit, {
  waitForEncoding: true,
  assemblyOptions: {
    params: {
      auth: { key: 'AUTH_KEY' },
      template_id: 'TEMPLATE_ID',
    },
  },
})
uppy.on('transloadit:complete', setSrc)
Be sure to fill in the AUTH_KEY and TEMPLATE_ID fields, with their values from the
Transloadit console.
Then, we'll need to add an event listener to the submit button, triggering the upload to Transloadit when it's clicked. Also, create variables for the button container and the loading dots, making sure to initially hide the loading dots.
const submit = document.getElementById('submit-button')
submit.addEventListener('click', uploadVideo)

const container = document.getElementById('container')

const loadingDots = document.getElementById('loading-dots')
loadingDots.style.display = 'none'

function uploadVideo() {
  const input = document.getElementById('file-input')
  const file = input.files[0] // should only ever be one
  if (file != null) {
    container.style.display = 'none'
    loadingDots.style.display = 'block'
    uppy.addFile(file)
    uppy.upload()
  }
}
You may have also noticed earlier that we referenced the setSrc function, as part of the
transloadit:complete event. This function will simply take the video URL from our Assembly
Status JSON, and update the video element with this new source. Let's create it now.
function setSrc(assembly) {
  const url = assembly.results.encode_360[0].ssl_url
  video.src = url
  video.load()
  video.play()
  container.style.display = 'block'
  loadingSpinner.style.display = 'none'
}
Make sure to call video.load() and video.play(), as this causes the element to reload the
source, thereby updating the video within our player.
Crafting a Template with Transloadit
After all that, our file upload still won't work, however. The final piece of the puzzle is to create a Template, which will process the uploaded video and return it back to our client.
{
  "steps": {
    ":original": {
      "robot": "/upload/handle"
    },
    "encode_360": {
      "use": ":original",
      "robot": "/video/encode",
      "result": true,
      "ffmpeg_stack": "v5.0.0",
      "preset": "webm",
      "turbo": true
    },
    "exported": {
      "use": ["encode_360"],
      "robot": "/s3/store",
      "credentials": "YOUR_AWS_CREDENTIALS"
    }
  }
}
The Template above transcodes the uploaded video into a uniform format, and then exports it to S3 for long-term storage, since Transloadit will only temporarily store files for 24 hours before deleting them.
Drawing to a close
Now that all the pieces of our jigsaw are in place, your 360° video player should be working beautifully. Be sure to show us how you got along on X (Twitter), or tell us about something else you've made using Transloadit!