Export files to DigitalOcean Spaces with ease
Today, we are introducing the new /digitalocean/store Robot, which allows you to export your Assembly results to DigitalOcean's Spaces Object Storage. This adds another option to the list of file exporting providers we already support, like Amazon S3, Rackspace Cloud Files and Dropbox. Check out the full list in our docs.
The /digitalocean/store Robot
You can use the /digitalocean/store Robot to upload your files or Assembly results to DigitalOcean Spaces for long and short term storage. Your files can set to be publicly available or private to your account.

Built upon the open source Ceph storage system, Spaces support most of the features Amazon S3 offers, which means that if you already use our /s3/store Robot, the API should look very familiar.
In this blog post, we're guiding you through the process of setting up a DigitalOcean Spaces account, transcoding your files and exporting the results to your Spaces account. If you just want to look at the Robot's API and play with it yourself, check out its docs and the example Assembly Instructions below:
{
  "steps": {
    "store": {
      "robot": "/digitalocean/store",
      "credentials": "spaces-store-demo",
      "space": "spaces-store-demo",
      "acl": "public-read"
    }
  }
}
Setting up DigitalOcean Spaces
The first step is to create a DigitalOcean account, if you haven't already done so. Head over to digitalocean.com to get started.
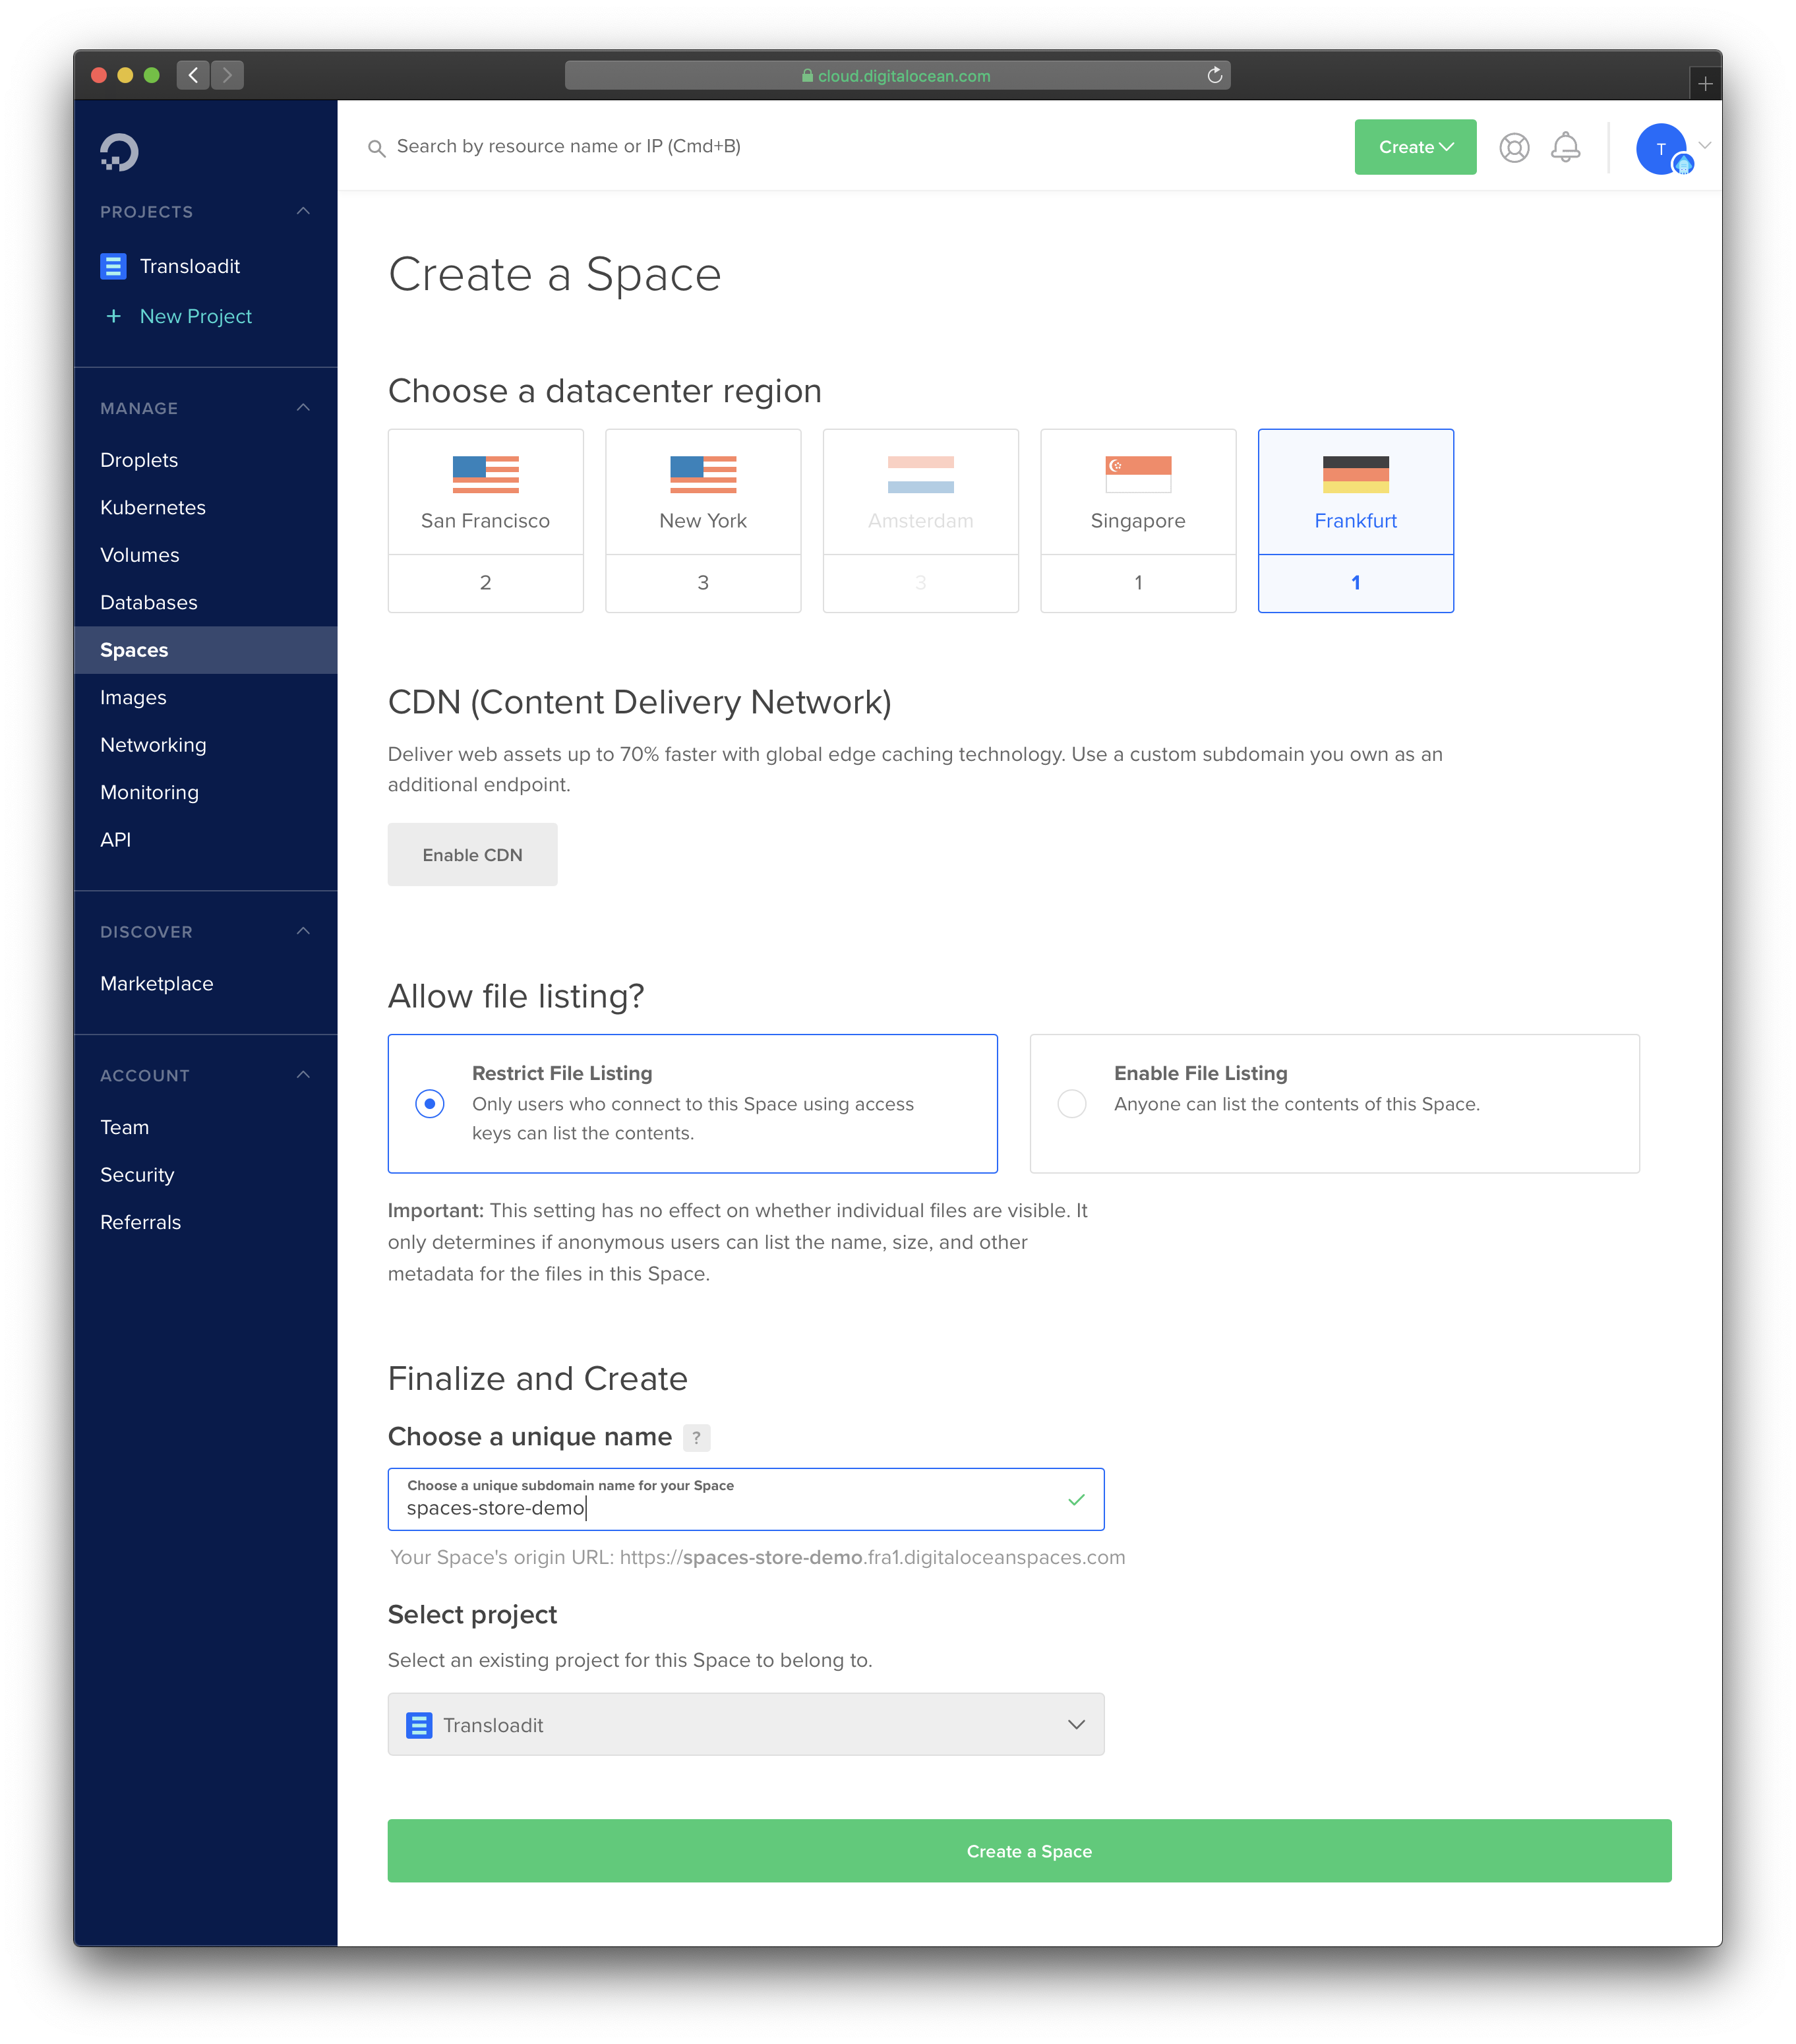
Next, navigate to the Spaces tab to create a new Space, which we're going to call
spaces-store-demo. Select the datacenter region closest to where you're going to fetch the data
from. Here, we've selected fra1 / Frankfurt.
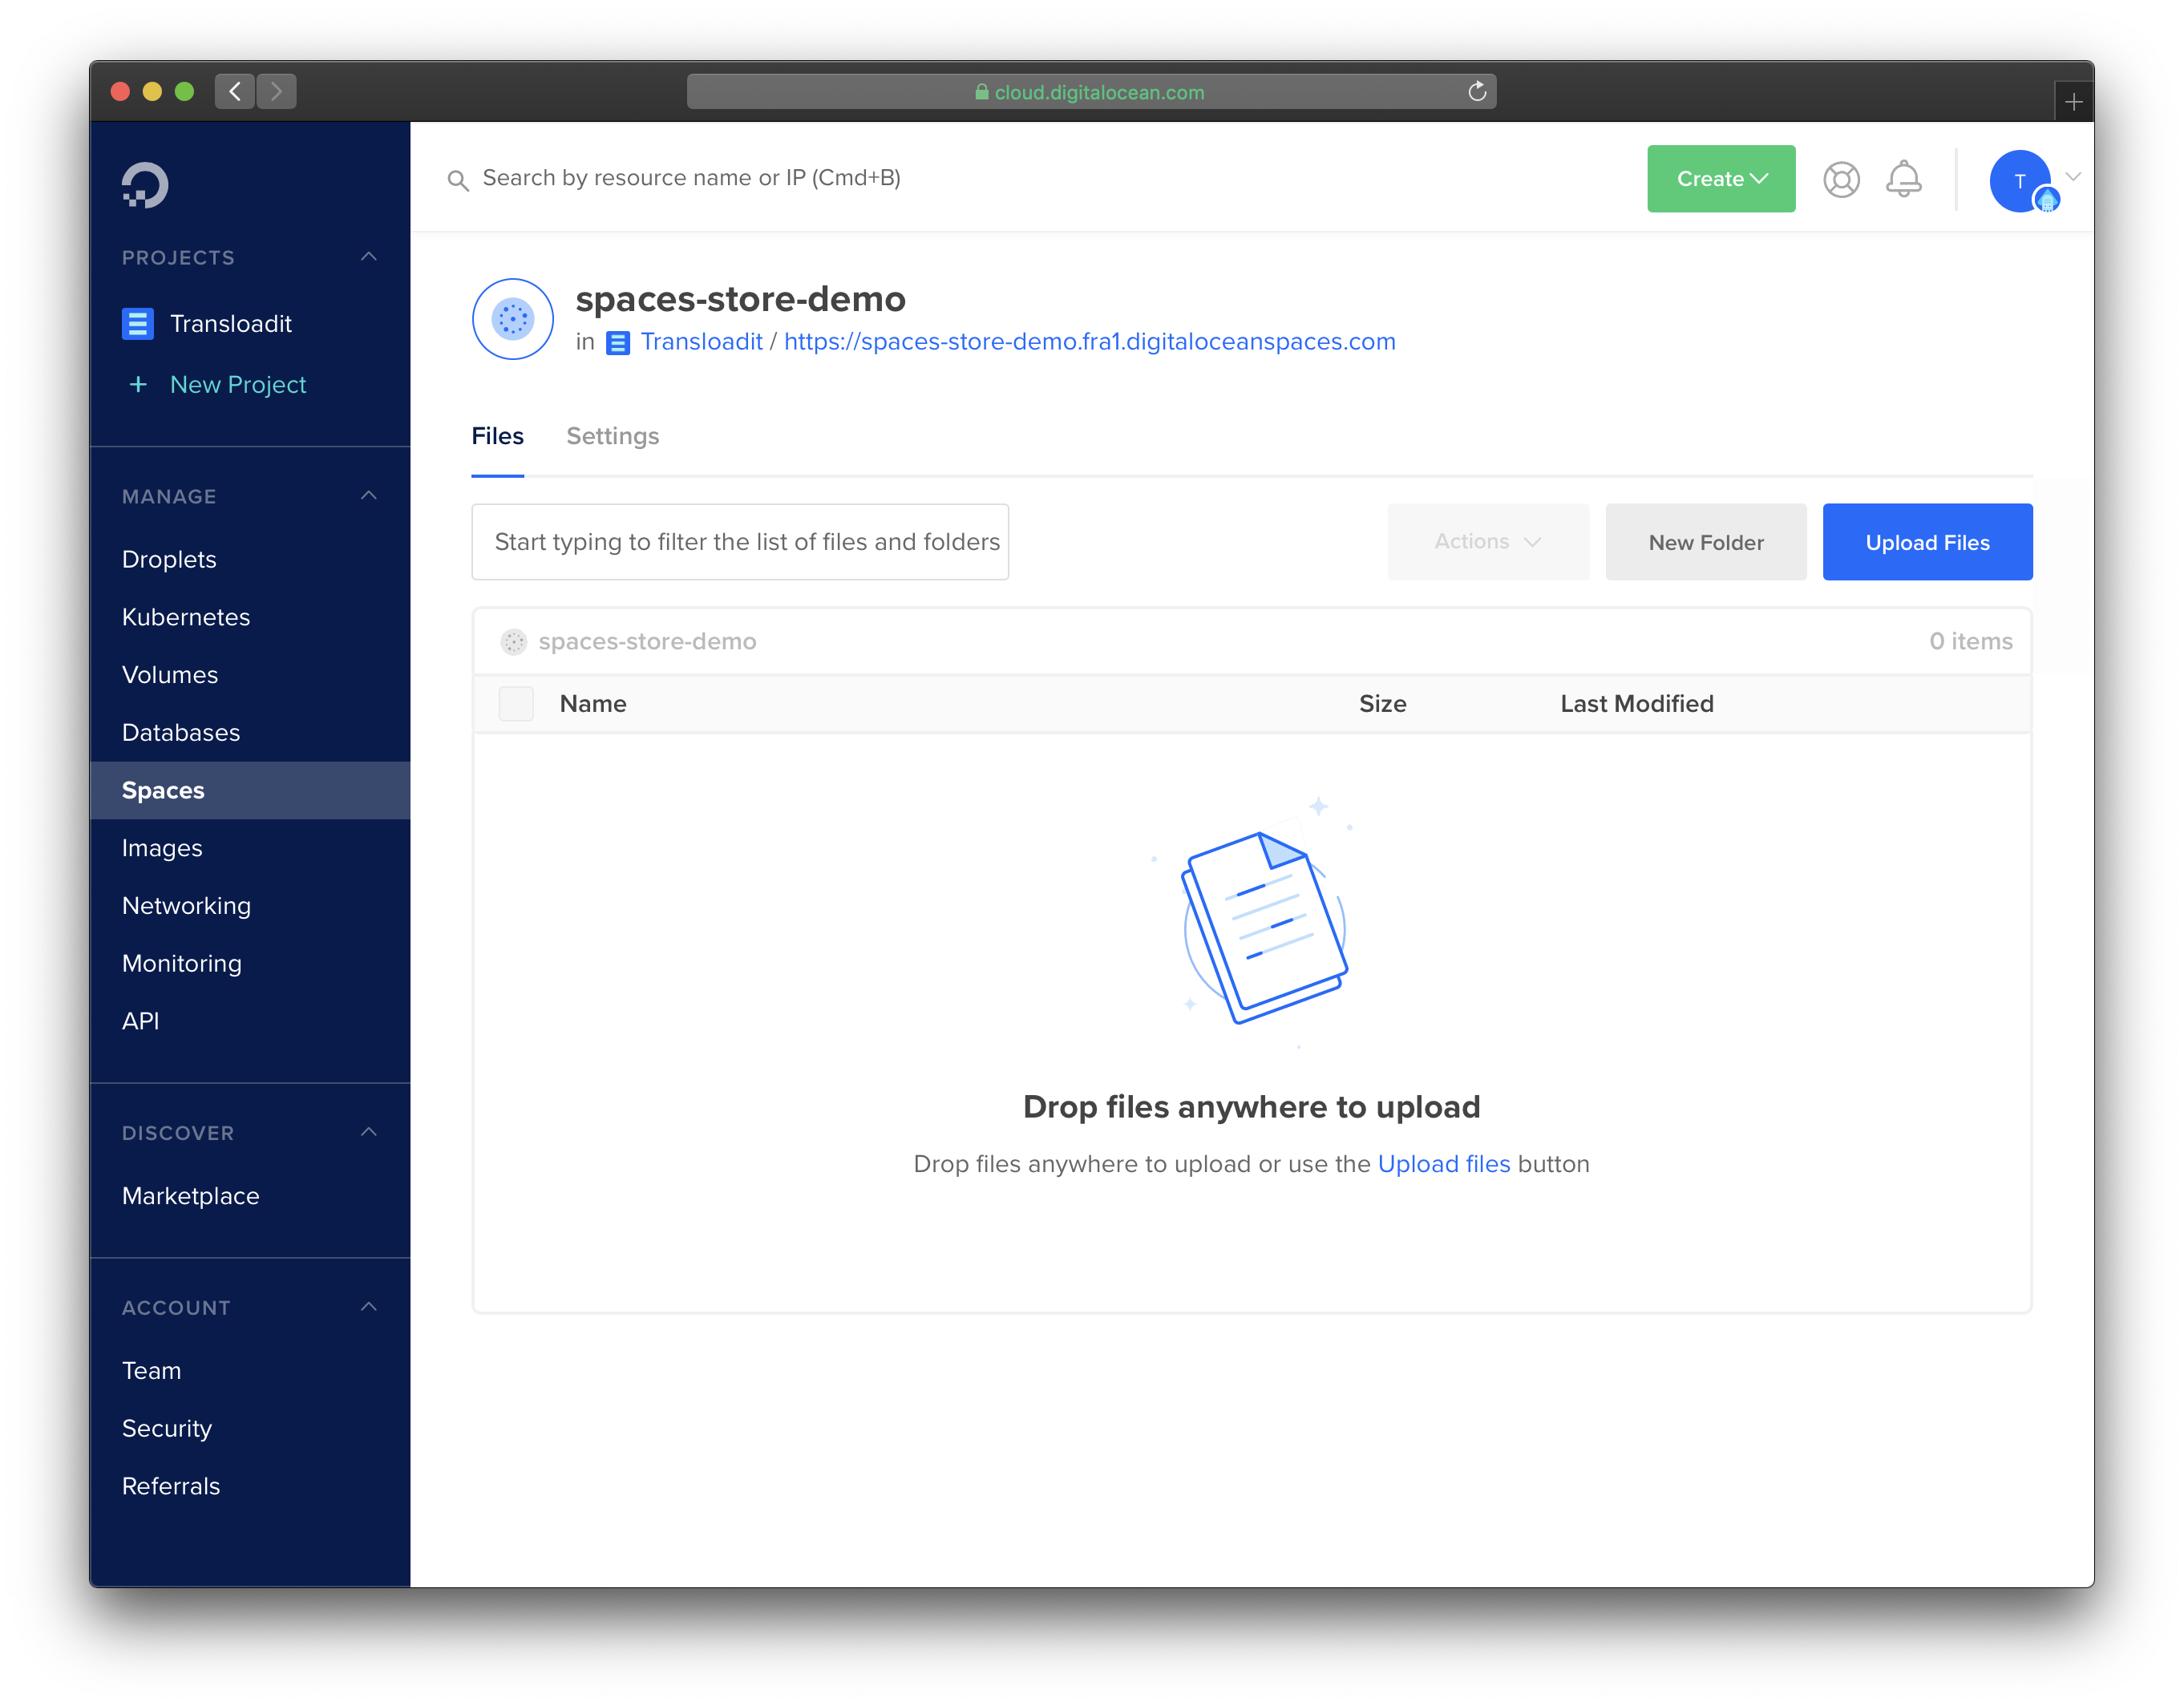
Once created, we have an empty Spaces account to which we can start exporting files:
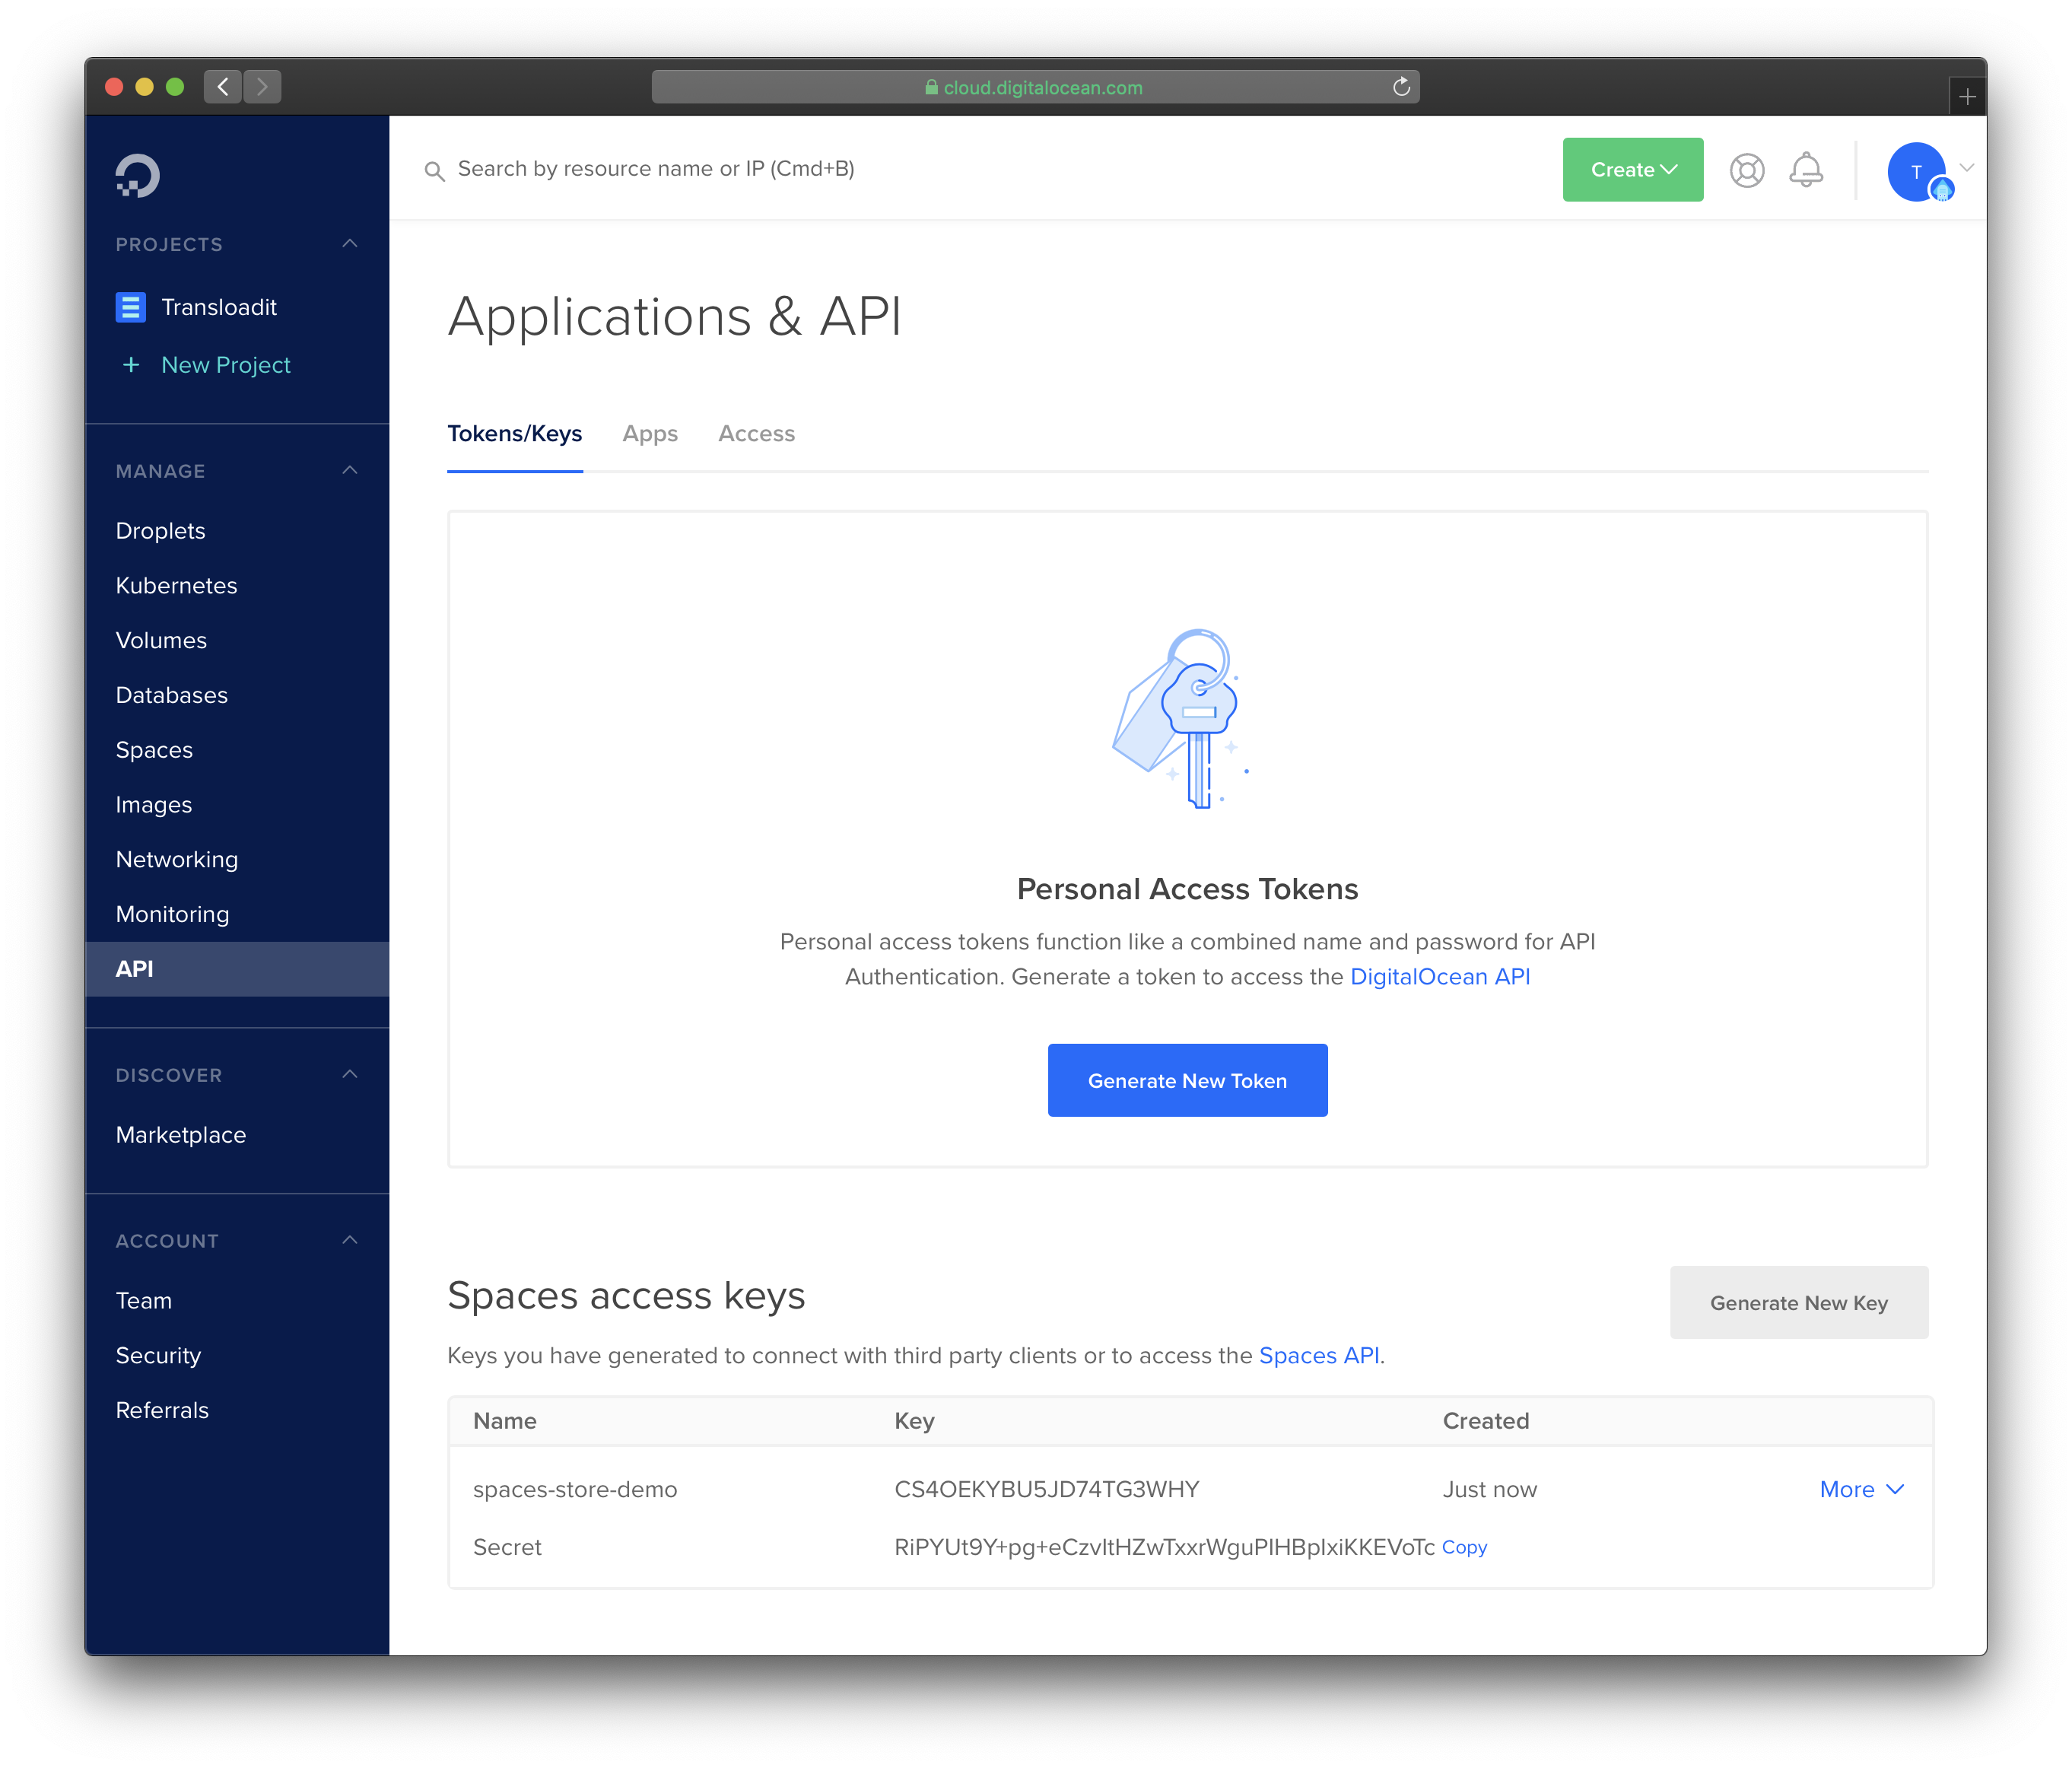
In order for our Robot to be able to talk to the DigitalOcean Spaces API, we also need to create a pair of Spaces access keys. You can do so in the API section of your DigitalOcean account. Best keep this tab open for now, as we're going to need the public and private secret keys in the following steps. Never share these credentials with anyone you don't want to have write access to your Space.
Creating Template Credentials
We're done with DigitalOcean for now, so let's head over to transloadit.com and create a free account! The Sandbox plan comes with 2 GB of transcoding volume and two priority job slots, so it's all you're going to need to get started with our Robots.
To allow better security and easier re-use, Transloadit offers you to create Template
Credentials and store the secrets for you. Once logged in, navigate to your account and select
Template Credentials. Choose the third party service Digital Ocean Spaces and enter your Space
credentials as follows, replacing space name, region, key id and secret access key as
required:
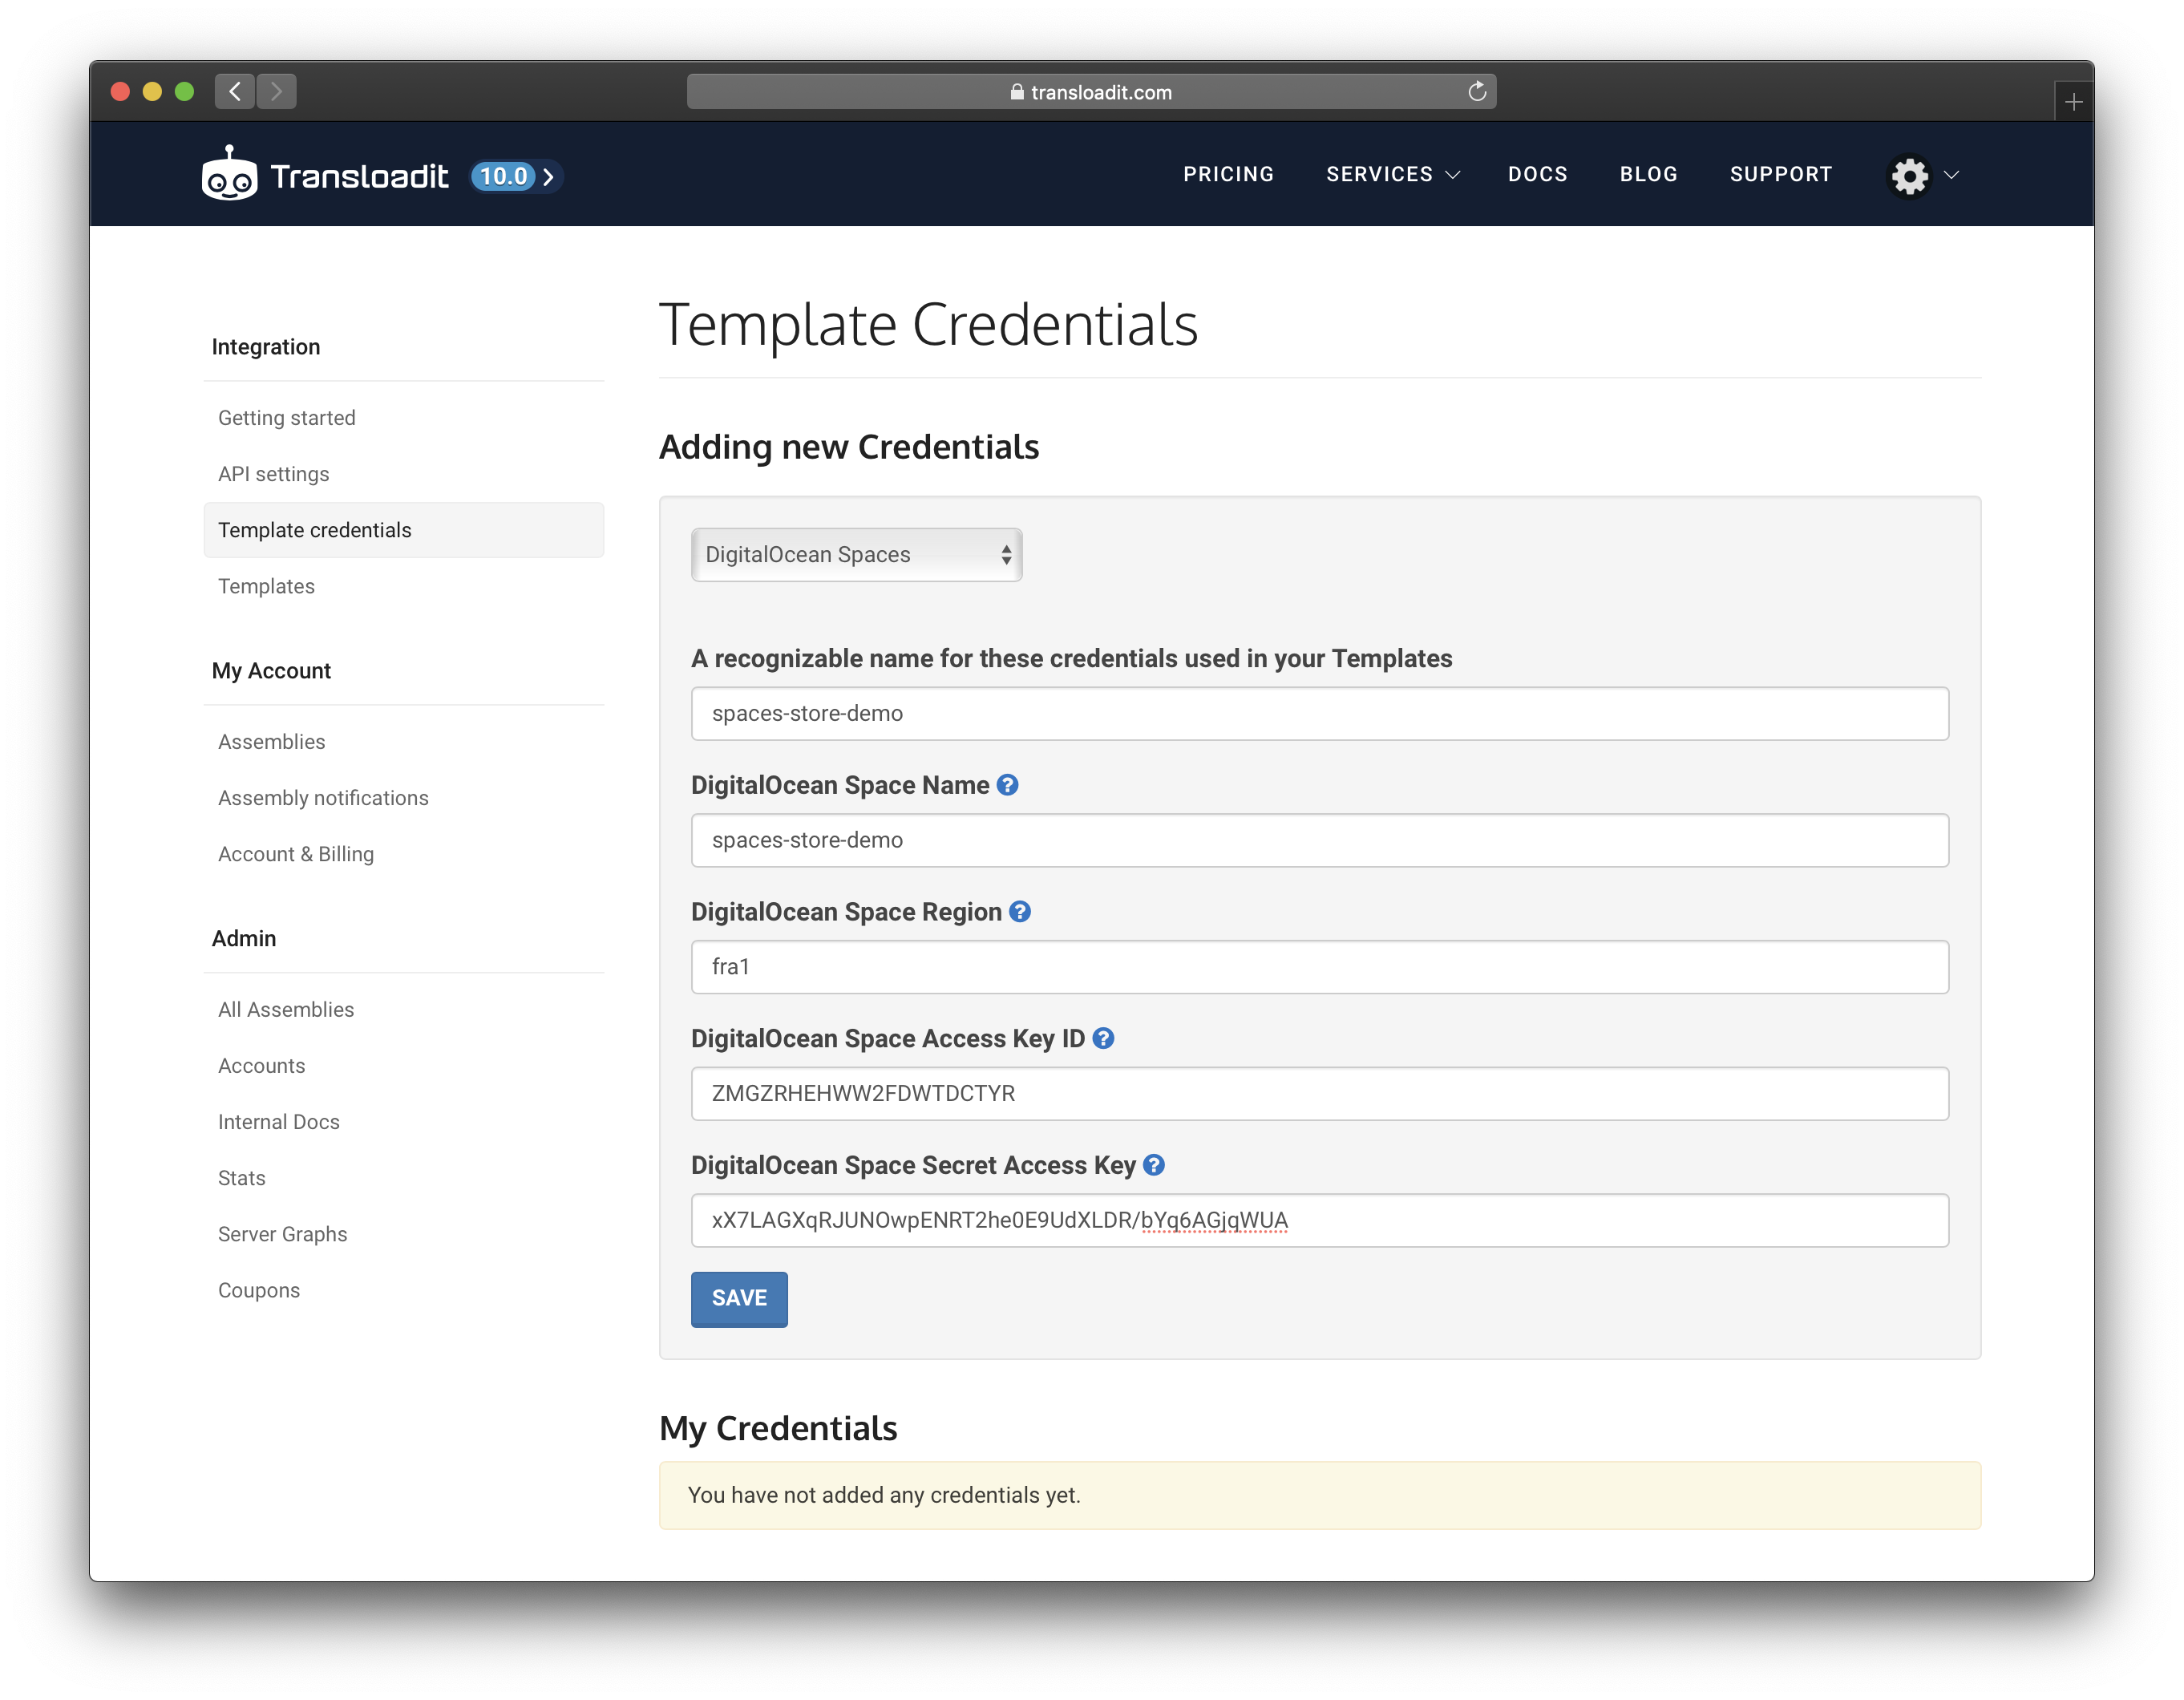
Hit save and you're done! The Template Credentials name — spaces-store-demo in
this case — is what we're going to use in the next step.
Detecting faces
Let's get to finally submitting some files to a new Assembly! Our example is going to use the /image/facedetect and /digitalocean/store Robots. Once we're done, you'll be able to upload image files in which all human faces are going to be detected and separately uploaded to your DigitalOcean Space.
For the purpose of this guide, we're using the curl(1) command line tool
to interact with the Transloadit API, which is most likely already installed on your computer. If
you are on Windows, check out the official
curl for Windows instructions.
First, another preparatory step: head over to the API settings in your Transloadit account and please copy the Auth Key.
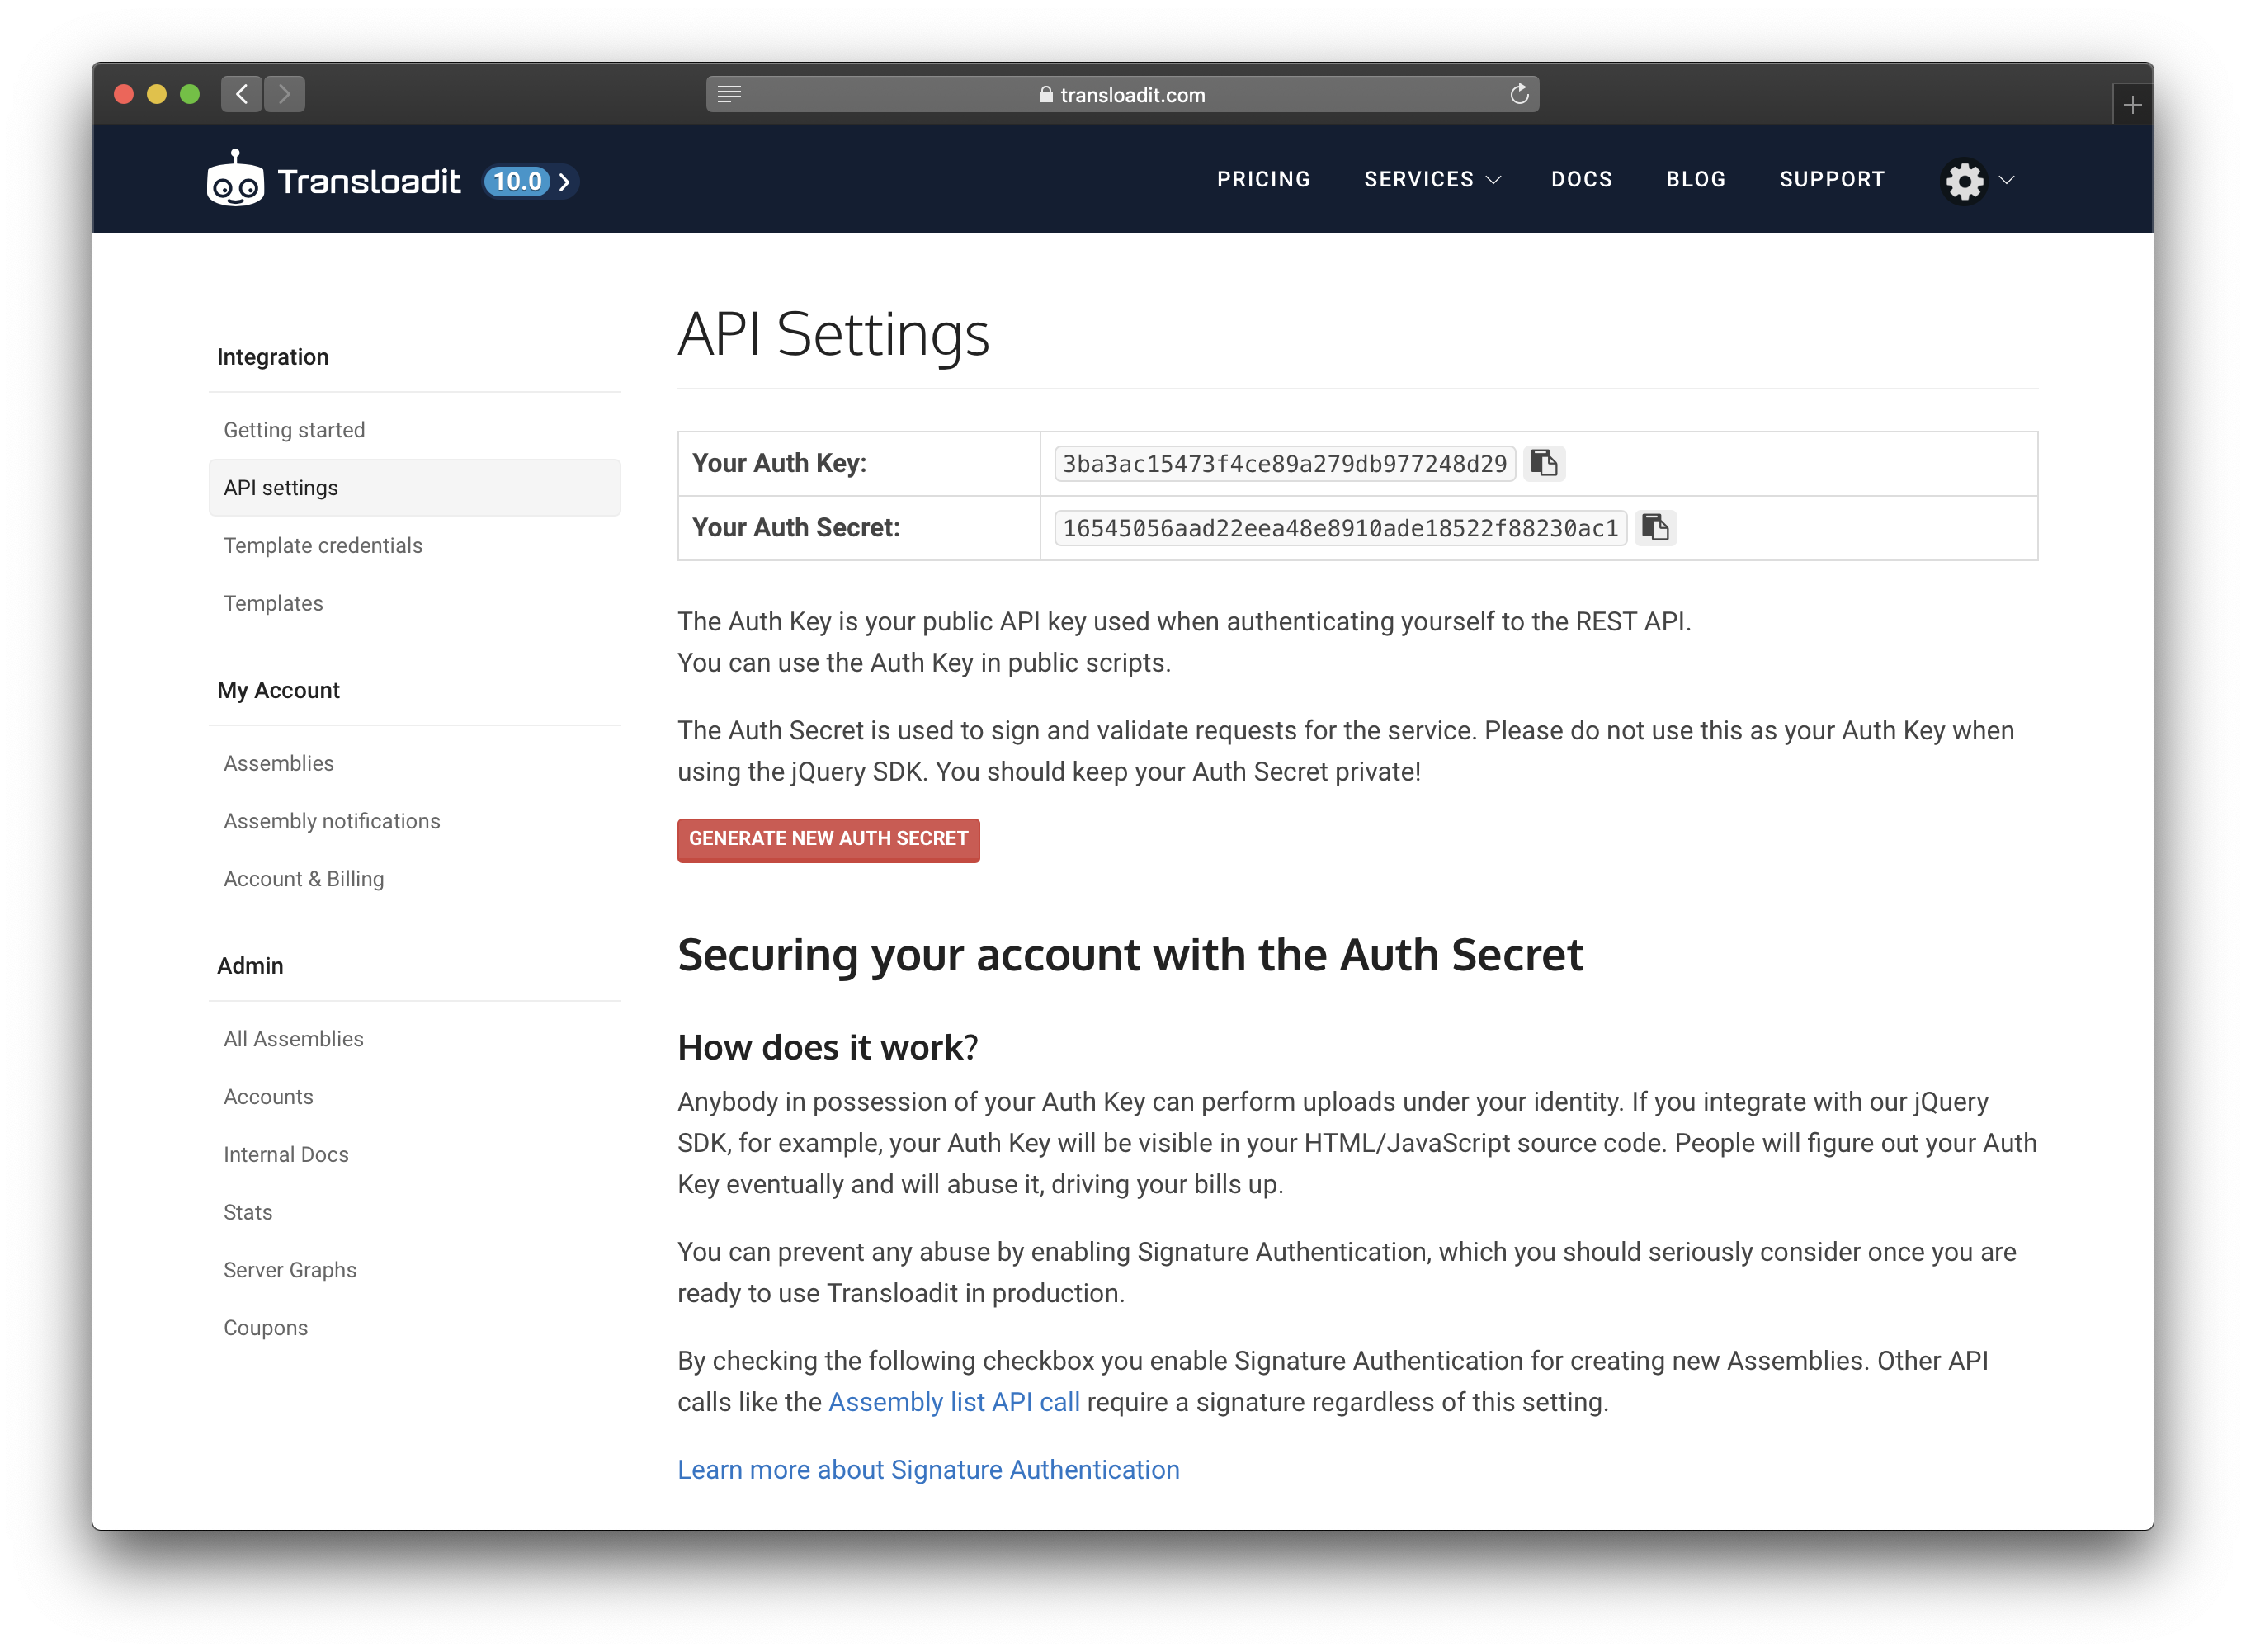
(Don't worry, we regenerated our Secret after taking this screenshot 😄)
Then, create a file with these Assembly Instructions, which we're going to call
params.json. Replace the auth.key with your personal Auth Key.
{
  "auth": {
    "key": "3ba3ac15473f4ce89a279db977248d29"
  },
  "steps": {
    "face-detect": {
      "use": ":original",
      "robot": "/image/facedetect",
      "crop": true,
      "faces": "each"
    },
    "store": {
      "use": "face-detect",
      "robot": "/digitalocean/store",
      "credentials": "spaces-store-demo",
      "space": "spaces-store-demo",
      "acl": "public-read"
    }
  }
}
The Assembly consists of two Steps:
- Detect faces and extract each detected face as a cropped image
- Upload the extracted faces to your DigitalOcean Space, using
public-readpermissions, so the files are publicly accessible
Testing the Assembly
Now there is just one piece missing, and that's to kick off the whole machinery using a single command!
You're going to need an image with some faces on it to test your Assembly. Here's one you can grab if you don't have one readily available:

Issue the following curl(1) command in your terminal, in the same folder where params.json and
the source image (here group.jpg) are stored. Pipe to
json_pp(1) in order to get a nicely
formatted JSON output.
curl \
  -s \
  -XPOST \
  -F params="$(< params.json)" \
  -F original=@group.jpg \
  https://api2.transloadit.com/assemblies \
  | json_pp
If you're curious why the
curl(1)command looks as it does:
-sinstructscurl(1)to be quiet, so we only see the HTTP response body
-XPOSTin order to make this a POST request-F ...Transloadit uses HTTP multipart formposts, so that the client can submit both the Assembly Instructions and the files, all in one request (and so that our API can be integrated with plain old<form>s). Here we use-Fto submit bothparams.jsonandgroup.jpg.
Head over to your Transloadit account's Assemblies page and click on the topmost row to see the results!
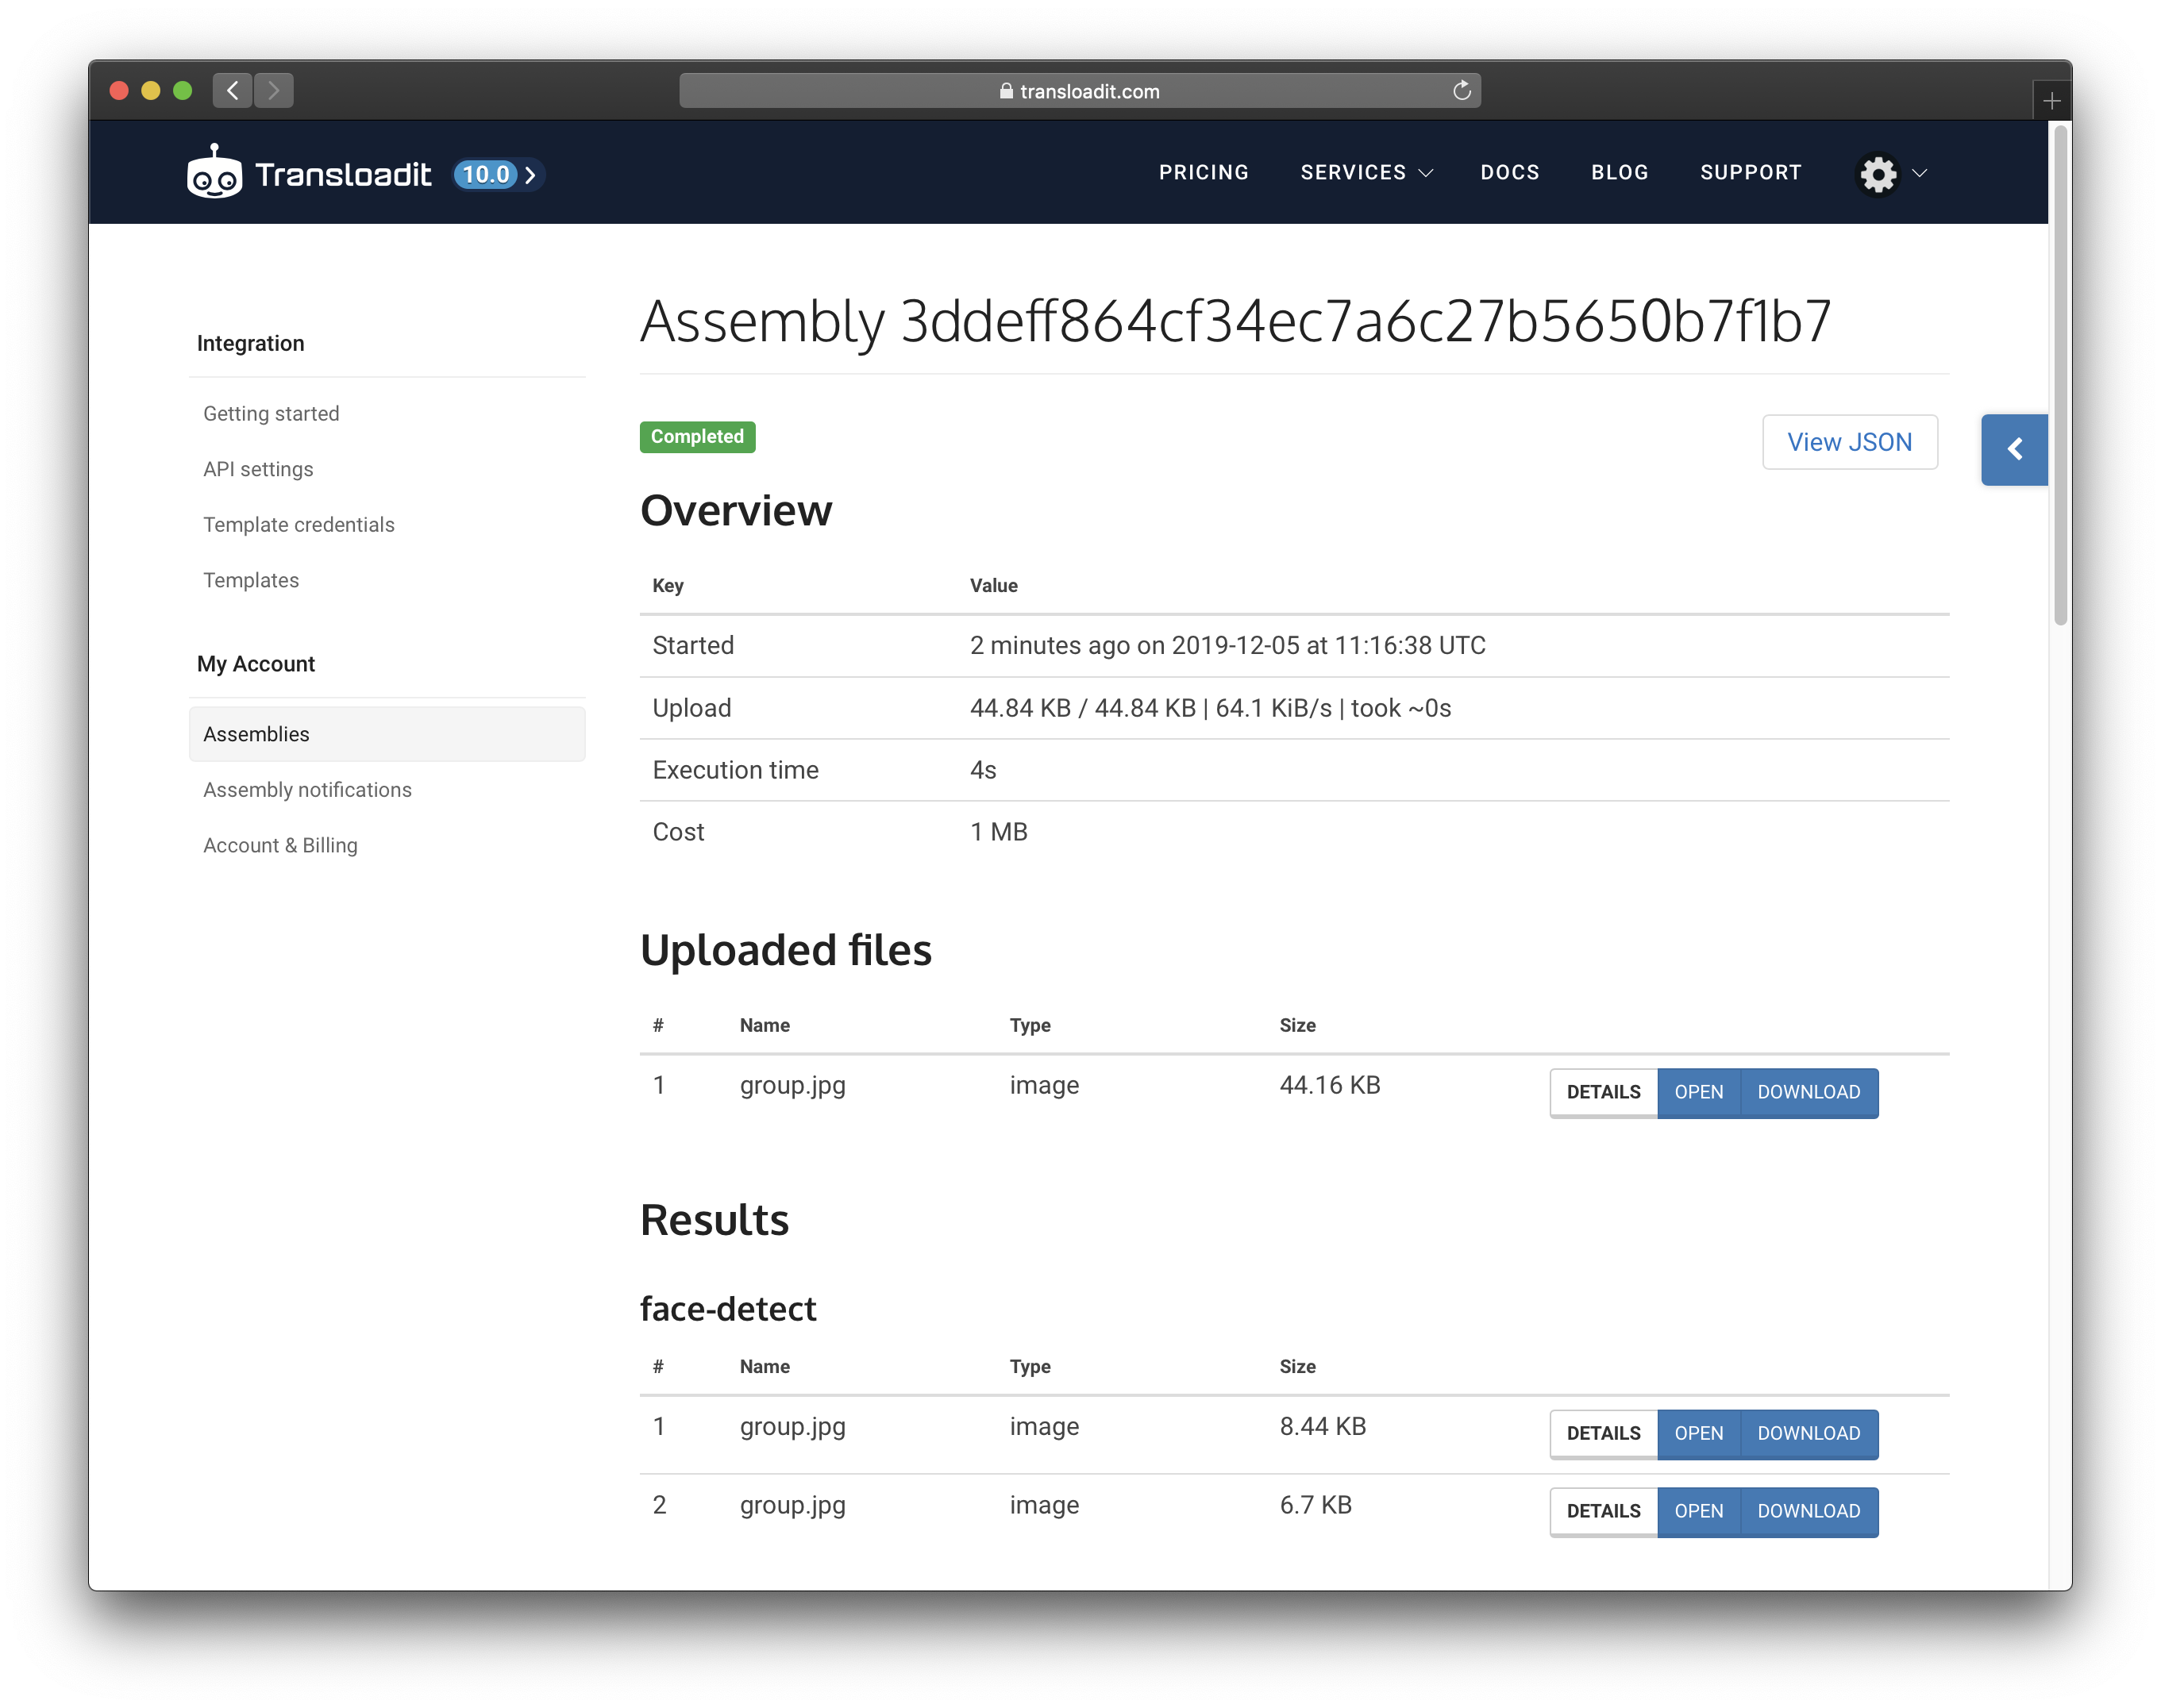
As you can see, in our case two faces were detected. Click on the OPEN buttons to the side of each result to see the cropped faces, served from your newly created DigitalOcean Space!


Fin
That's it! We hope you liked this blog post and are looking forward to the next one. And if you'd like to try this, sign up for a free Transloadit account today!