Re-Loadit: streamlining Backblaze to Dropbox imports

Today, we're bringing back one of our favorite blog series: the Re-Loadit series, in which we shine a light on some of our less-covered features.
The focus in this edition is on our /backblaze/import Robot. We showcase how to import a file from Backblaze, and then export said file to Dropbox. We already have Re-loadit posts on storing files on Dropbox and importing files from Dropbox, so go ahead and check those out if you wish to learn more about the Dropbox side of things.

The /backblaze/import Robot
The /backblaze/import Robot is one of the many import Robots in our arsenal. With Backblaze providing a long-running, stellar cloud storage system, it's obvious why we created compatibility with their service. It is now high time for a blog post on this Robot.
So without further ado, let's get to it!
Setting up Backblaze
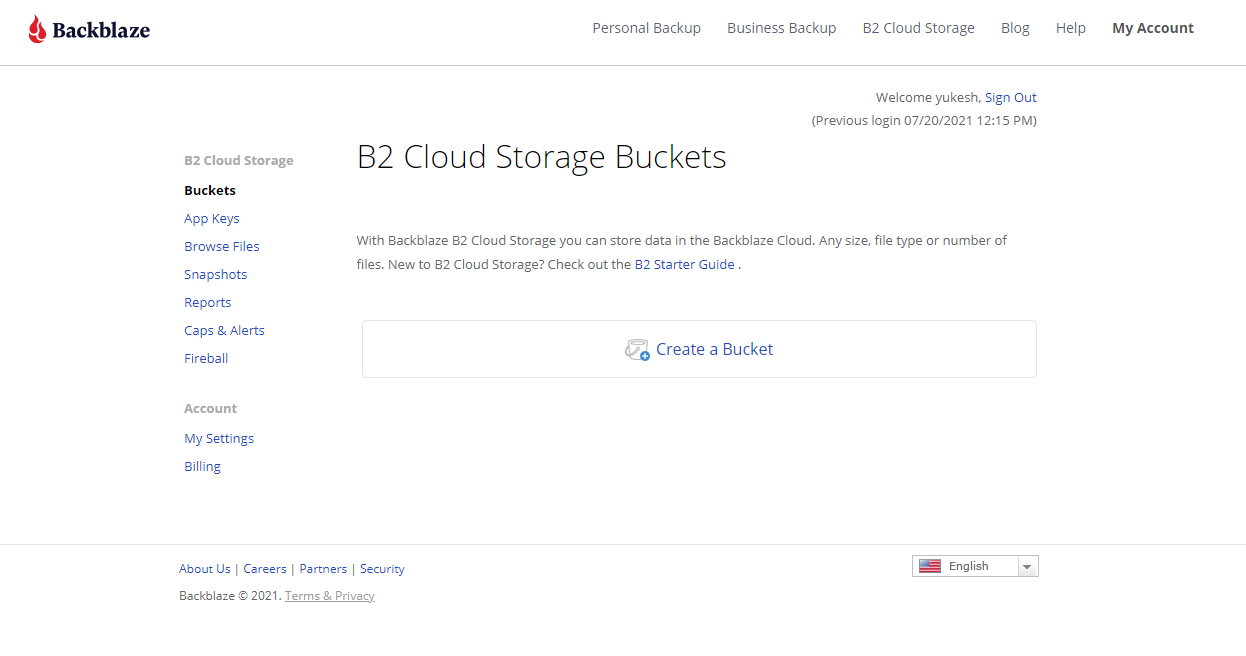
You need a Backblaze account to follow along, so go to the Backblaze website, create an account, and sign in. Once you have successfully signed in, you will be redirected to your B2 Cloud Storage Buckets.
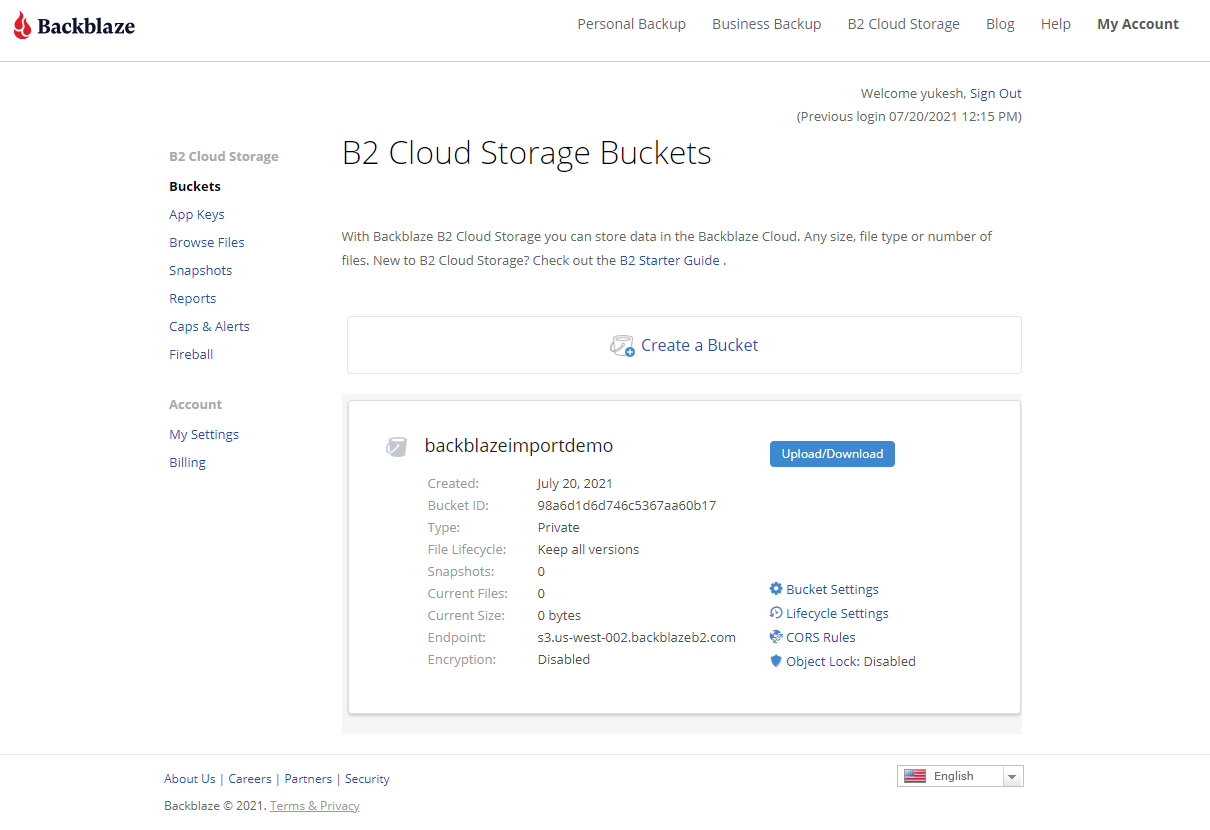
Click on Create a Bucket, enter a unique name and note it down for later reference, then enable the appropriate features for your use case. For this showcase, we have chosen "backblazeimportdemo" as the unique name for our bucket. Now click Create a Bucket, and your Backblaze bucket will be created and displayed on the B2 Cloud Storage Buckets page.
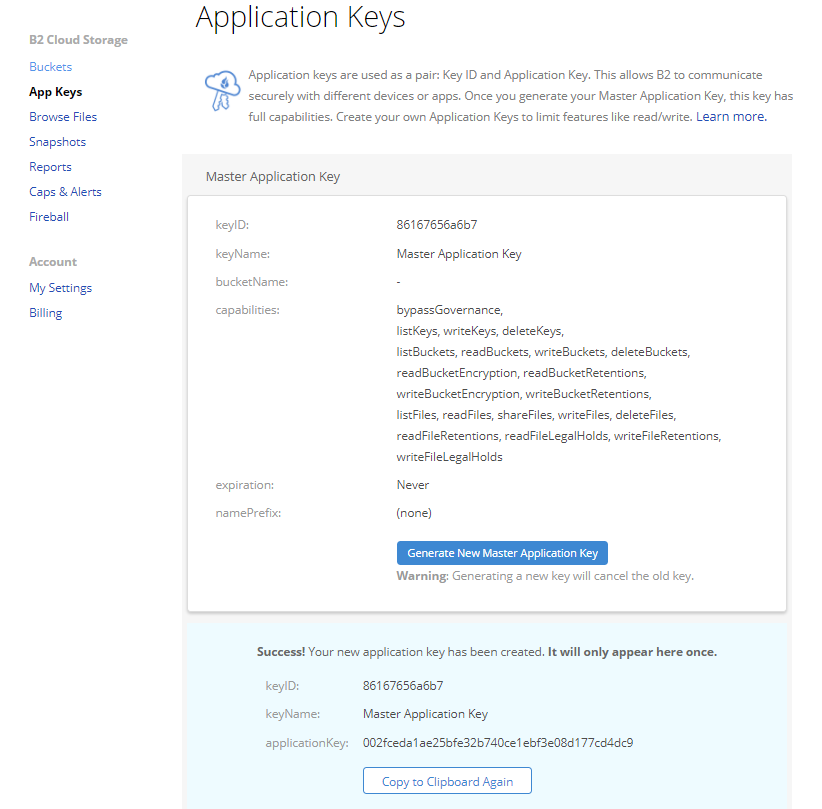
After we've created our bucket, we'll need to configure how Backblaze communicates with our
Robot. To do so, we'll need the keyID and applicationKey, which can be found on the
left under the App Keys tab. You can create your application keys on the App Keys page,
specifying which bucket the key can access and whether you can edit the files in the bucket. For
this demonstration, we will use the Master Application Key.
To generate the required two pieces of information, click Generate New Master Application Key and note down your key values. Be careful: never share your keys with anyone who you don't want to have access to your buckets! If you need to, you can reset your key by clicking Generate New Master Application Key again.
Creating Template Credentials
Now that we have all the required information, head over to your Transloadit console. If you don't have an account yet, go ahead and sign up. Our Community Plan includes 5GB of free encoding data per month!
- Go to Credentials and enter your Transloadit account password.
- Under Third-party Credentials, click Add new Credentials, which will open a pop-up box where you can enter the information of your Backblaze bucket.
- Once the pop-up box appears, choose Backblaze as the service and enter all the information from your Backblaze account.
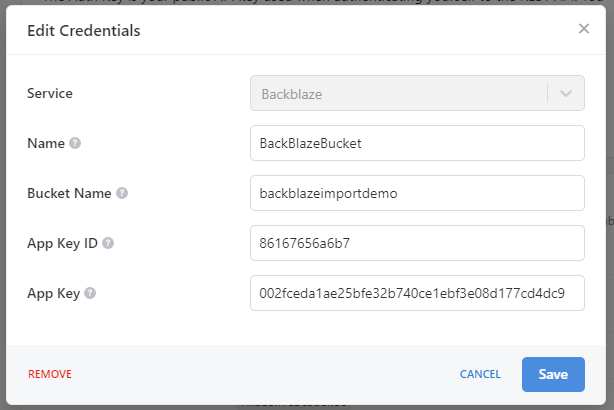
Press Save and note down the name of your Backblaze Credentials. In this instance, we have called it "BackBlazeBucket".
Creating the Assembly
With everything external now set up (excluding Dropbox) and assuming you have uploaded a file to your Backblaze bucket, we can now create our Assembly. We need to create a Template to demonstrate our newly configured Backblaze compatibility, so copy the JSON below to a fresh Template.
{
  "steps": {
    "import": {
      "robot": "/backblaze/import",
      "credentials": "BackBlazeBucket",
      "path": "sourceFolder/",
      "result": true
    },
    "export": {
      "use": "import",
      "robot": "/dropbox/store",
      "credentials": "TestWorkBox",
      "path": "testfolder/${file.name}"
    }
  }
}
In this JSON, we import a file from our Backblaze B2 bucket and export it to Dropbox. Next,
reference the Backblaze Credential name you noted down before and enter that name as the
credentials parameter value. For the import Robot's path parameter, you must enter
the path to your desired file.
As was said at the beginning of this article, we won't be delving into the Dropbox side of things. If you need a refresher, go ahead and take a look at our Re-loadit articles on importing files from Dropbox and storing files on Dropbox.
The results
A quick check shows that the file present in our B2 bucket is also now in our Dropbox!

Hopefully, this blog has shown that you can effortlessly import files from your Backblaze B2 bucket. Now go and import as many files as you want. Don't worry about us – we can handle it! And that's it for another installment of the Re-Loadit series. We hope you are looking forward to the next one!