How to set up an S3 bucket to use with Transloadit

Using Amazon S3 with Transloadit can be a powerful combination, but several customers have told us it can be a struggle to get things working just the way they want them to. To help them, and hopefully others as well, we've decided to write a comprehensive guide on how to integrate both services.

Creating a bucket
Naturally, our first step will be to make an AWS account. If you don't already have one, head to their sign-up page and follow the instructions provided.
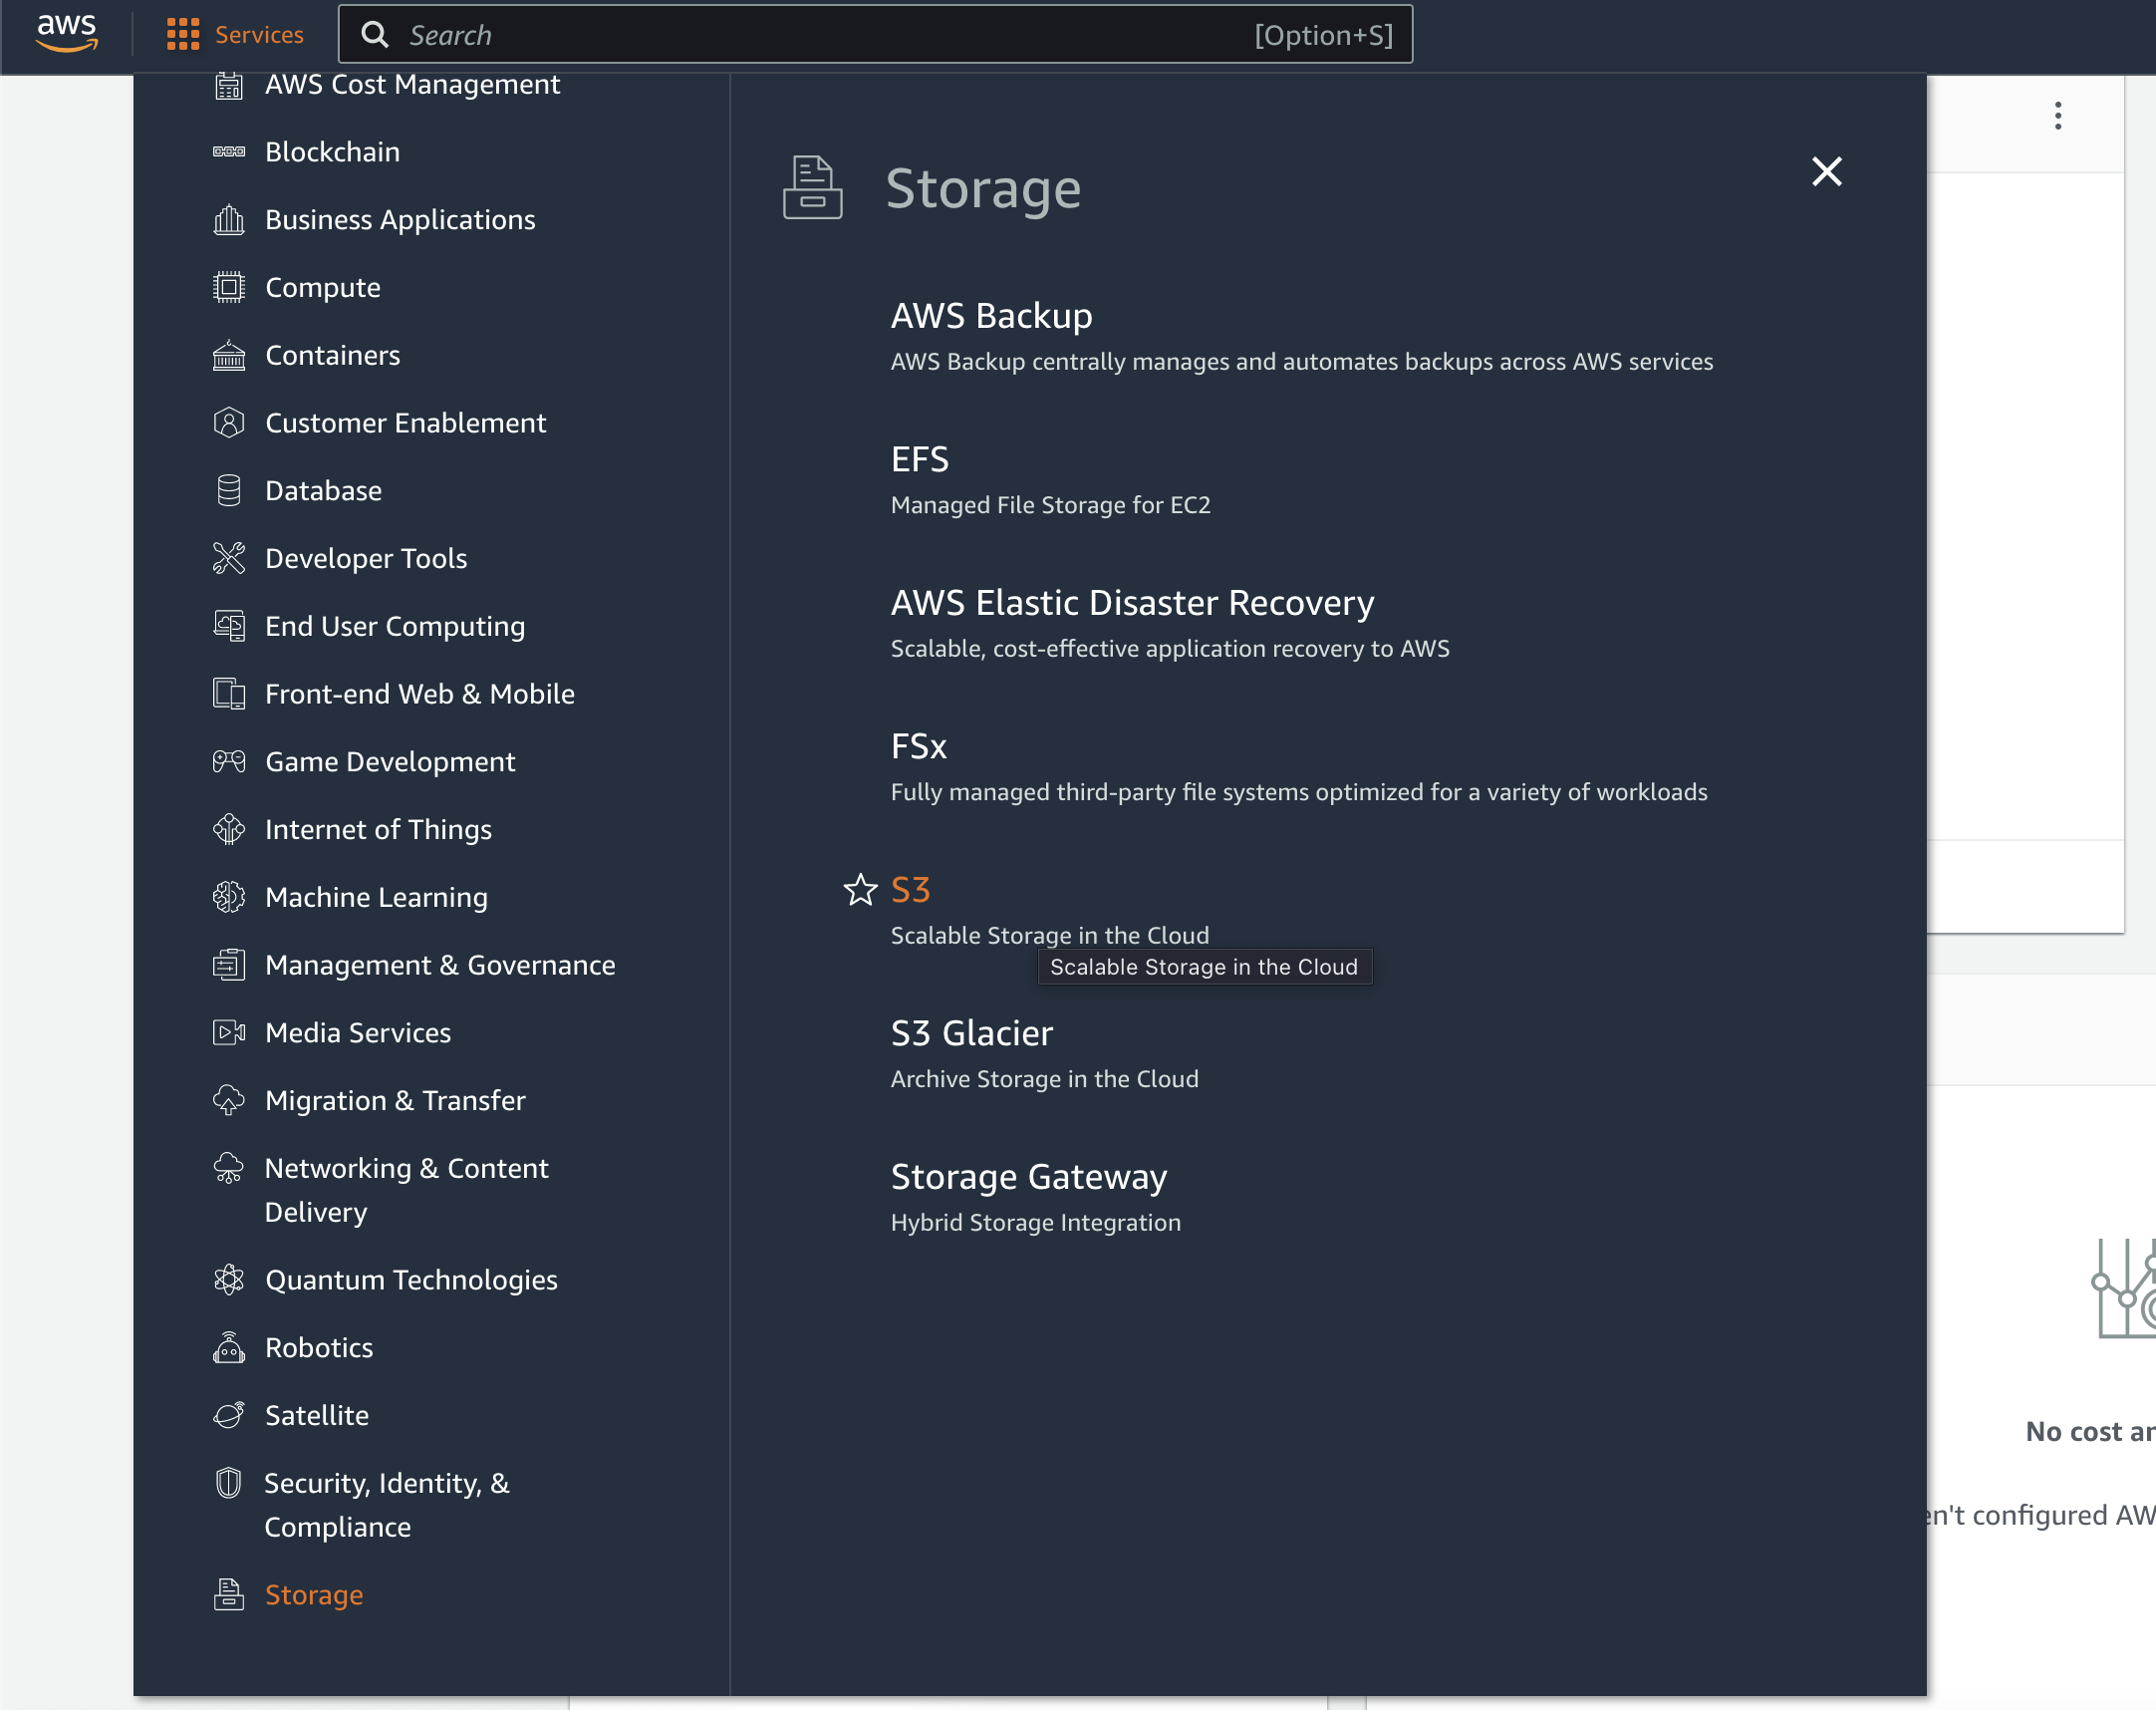
After completing this, navigate to Storage and then select S3 from the Services tab as shown below.
From the Management Console, click Create Bucket. Give the bucket a name, and pick a region that is closest to the majority of your users. Keep a note of both the name and region as we'll need to pass this information to Transloadit later.
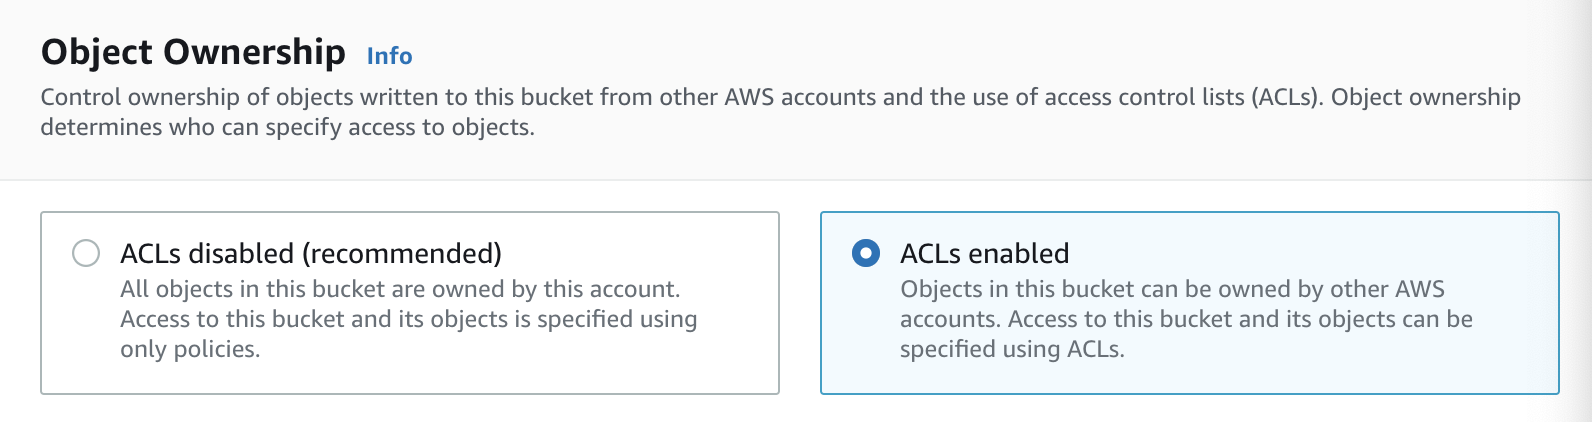
Importantly, under Object Ownership enable ACLs. Without this, we won't be able to import or export our files.
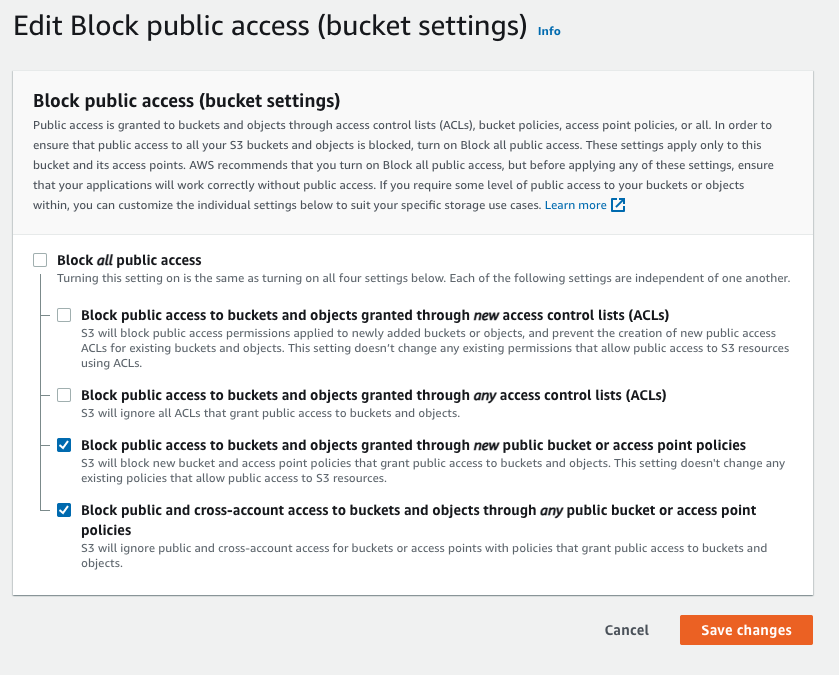
Similarly, under Block public access, leave the first two options unchecked, so that it looks the same as the image below.
Setting up Transloadit Credentials
Now our bucket is set up and ready to start storing our files! However, we still need to grab some credentials from AWS before we head to Transloadit to set up our Template.
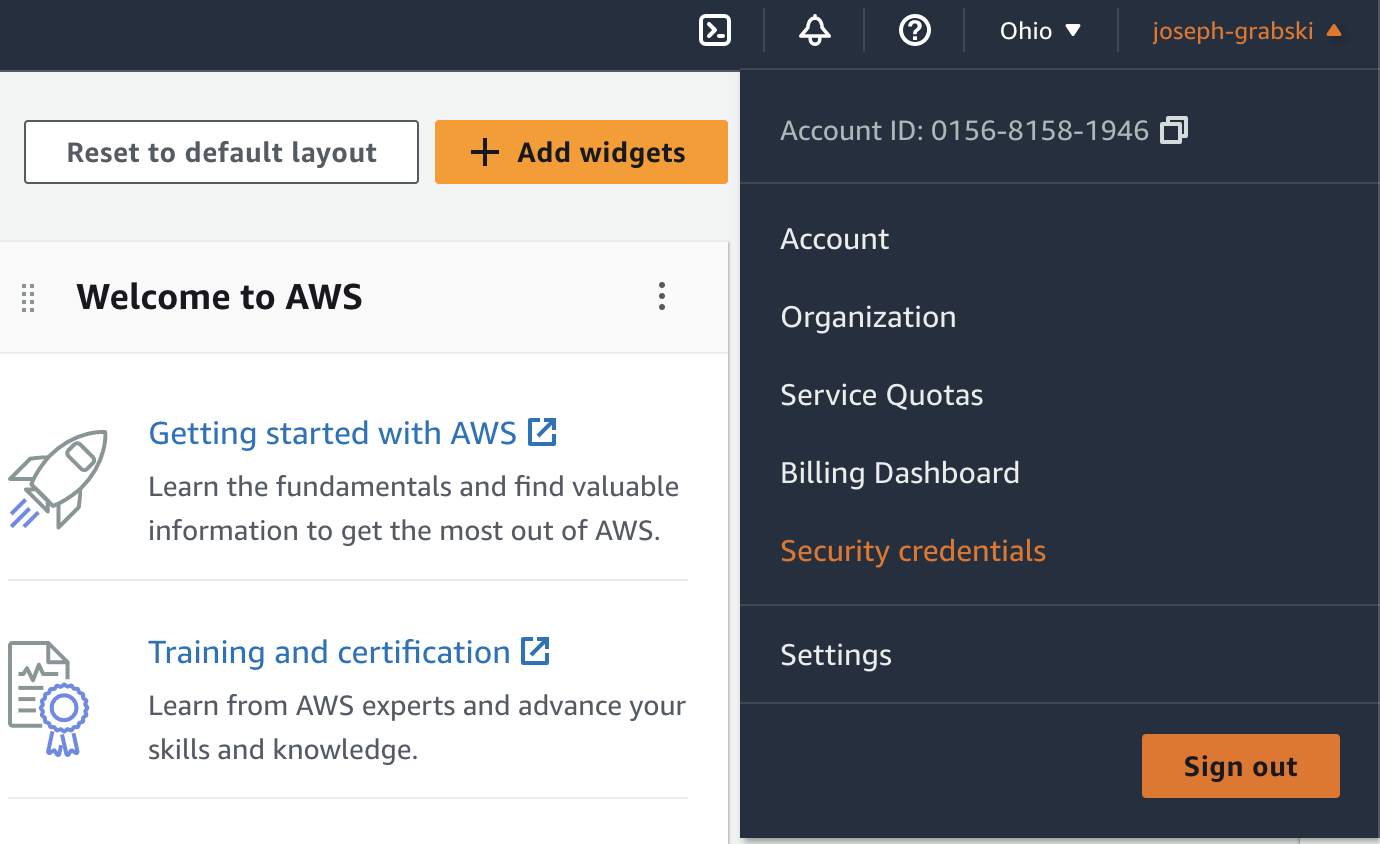
To do this, click your username in the top right corner and select Security Credentials. From here, scroll down to Access Keys and create a new access key. Store both your key and secret somewhere secure.
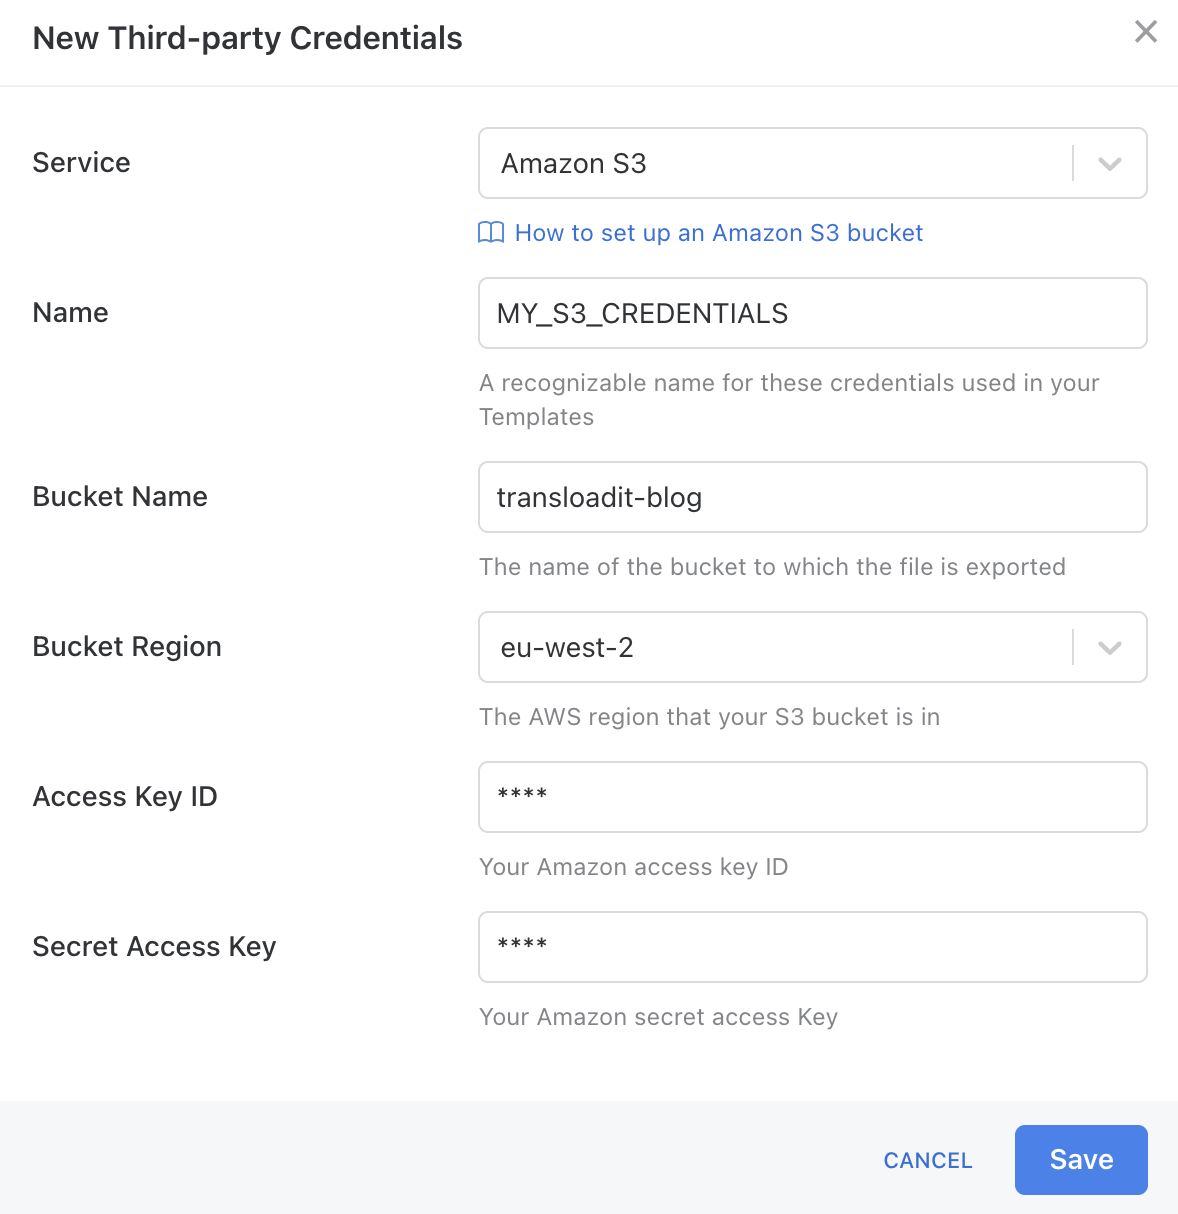
Now, go to the Credentials page on the Transloadit Console. From here, scroll to Third-party Credentials and click Add new Credential.
Select Amazon S3 as the Service, give the credential a memorable name, and assign the bucket name and region from before. Also make sure to add your access key and secret here.
Crafting a Template
Transloadit now has everything necessary in order to communicate with S3 to import or export your files. Let's put it to the test!
The Template below will resize an uploaded image to 200x200 using the fillcrop strategy
– thanks to our handy /image/resize Robot.
Afterwards, both the resized and original file will be uploaded to S3 for permanent storage.
{
  "steps": {
    ":original": {
      "robot": "/upload/handle"
    },
    "fillcropped": {
      "use": ":original",
      "robot": "/image/resize",
      "result": true,
      "height": "200",
      "width": "200",
      "imagemagick_stack": "{{stacks.imagemagick.recommended_version}}",
      "resize_strategy": "fillcrop"
    },
    "exported": {
      "use": ["fillcropped", ":original"],
      "robot": "/s3/store",
      "credentials": "MY_S3_CREDENTIALS"
    }
  }
}
After giving it a whirl, we can see both files in our S3 bucket, ready to be accessed whenever we want!
That's the end of today's guide. We know that S3 can be tricky to set up, so please let us know whether you're still running into trouble and we'll be happy to offer support.